Arun Bavera
Getting the Database Backup Report for all Monitored Targets in Enterprise Manager
Updating the Oracle EM12c Agent Configuration Properties in Bulk
1. Goto Enterprise->Job ->Activity->Choose from ‘create Job’ list -> Agent Configuration Operation ->Click Go

Give job name and Add all the Agent Targets you want to modify
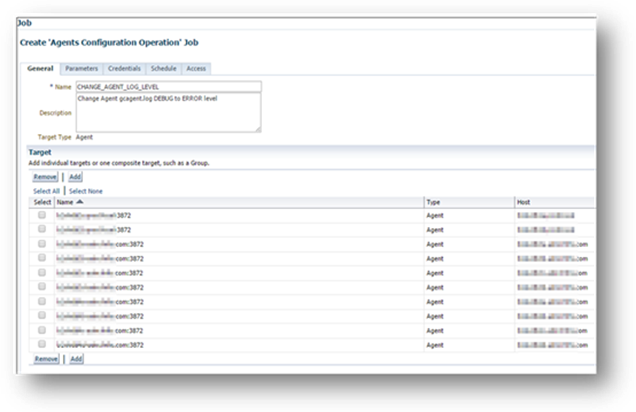
Goto Parameter tab and Add Custom properties or Change the existing listed properties values.
For example:
Name: Log.log.level
Value: ERROR
 This job does not require any credentials.
 Click Submit:
Script to get OMS ,Agent and DB Plugin Patch details
GETTING OMS PATCH DETAILS
export OMS_HOME=/u01/middleware/oms
export ORACLE_HOME=$OMS_HOME
export PLUGIN_HOME=/u01/middleware/plugins/oracle.sysman.db.oms.plugin_12.1.0.8.0/
DT=$(date '+%m%d%Y')
LOG=/tmp/EM_Patch_details_${DT}.txt
echo "1.Getting the OMS system patches" >${LOG}
echo "=====================================================================================" >>${LOG}
$ORACLE_HOME/OPatch/opatch lsinventory -details >>${LOG}
echo "" >>${LOG}
echo "======================================================================================" >>${LOG}
echo "2.Getting the OMS DB PLUGIN patches" >>${LOG}
echo "======================================================================================" >>${LOG}
$ORACLE_HOME/OPatch/opatch lsinventory -oh $PLUGIN_HOME -details >>${LOG}
GETTING AGENT PATCH DETAILS
export AGENT_BASE=/u01/app/oracle/product/agent12c
export AGENT_HOME=${AGENT_BASE}/core/12.1.0.5.0
export ORACLE_HOME=${AGENT_HOME}
export PLUGIN_HOME=${AGENT_BASE}/plugins/oracle.sysman.db.agent.plugin_12.1.0.8.0/
DT=$(date '+%m%d%Y')
LOG=/tmp/AGENT_Patch_details_${DT}.txt
echo "1.Getting the AGENT system patches" >${LOG}
echo "=====================================================================================" >>${LOG}
$ORACLE_HOME/OPatch/opatch lsinventory -details >>${LOG}
echo "" >>${LOG}
echo "======================================================================================" >>${LOG}
echo "2.Getting the AGENT DB PLUGIN patches" >>${LOG}
echo "======================================================================================" >>${LOG}
$ORACLE_HOME/OPatch/opatch lsinventory -oh $PLUGIN_HOME -details >>${LOG}
ZDLRA Database Patch Rollback fails with : Re-link fails on target "ioracle"
Getting ready your EM12cR5 system with latest Patches for Exadata Management
For OMS side:
PSU (12.1.0.5.160719) Note 2158181.1 Patch 23087400 ( latest PSU)
OMS System side Monthly bundle patch – OMS Patch 23741465 ( jul2016)
For Agent side:
Agent Core System Patch: 23639986
Agent DB 12.1.0.8.0 Discovery Patch: 22135601
Agent DB 12.1.0.8.0 Monitoring Patch: 23517257
Agent FMW 12.1.0.8.0 Discovery: 23217959
Agent FMW 12.1.0.8.0 Monitoring: 23741311
EM for Exadata Plug-in 12.1.0.6.160731
Agent Exadata 12.1.0.6.0 Monitoring: 23639890
Agent Exadata 12.1.0.6.0 Discovery: 20844924
Use the EM Patch capability to create a Patch plan and apply these patches (agent side only):
Automating the Agent Side Patching
If you want to automate applying these patches for every new agent and plugin deployment follow this process:
Install the above agent side patches on any one of the agent. Use this as Golden Template and use Clone feature to deploy the further agent. ( Each GoldenTemplate for each platform)
OR
Step 1: Copy the Agent Sytem Patch to: $OMS_HOME/install/oneoffs/<agentversion>/<platform>
For Example:
cd /u01/app/oracle/middleware/oms/install/oneoffs/12.1.0.5.0/Generic
ls -ltr
total 19987
-rw-r--r-- 1 emuser oinstall 20383932 Aug 23 10:36 p23639986_121050_Generic.zipStep2: Create the custom plugin out of the above any one Golden Agent, to bake the patches in the default plugins:
Database Custom Plugin creation:
emcli create_custom_plugin_update -agent_name="mysystem.com:3872" -plugin_id="oracle.sysman.db" -overwrite
FMW Custom Plugin creation:
emcli create_custom_plugin_update -agent_name="mysystem.com:3872" -plugin_id="oracle.sysman.emas" -overwrite
Exadata Custom Plugin creation:
emcli create_custom_plugin_update -agent_name="mysystem.com:3872" -plugin_id="oracle.sysman.xa" -overwrite
Verify the patches:
emcli list_patches_in_custom_plugin_update -plugin="oracle.sysman.db"
emcli list_patches_in_custom_plugin_update -plugin="oracle.sysman.db" -discovery
emcli list_patches_in_custom_plugin_update -plugin="oracle.sysman.emas"
emcli list_patches_in_custom_plugin_update -plugin="oracle.sysman.emas" -discovery
emcli list_patches_in_custom_plugin_update -plugin="oracle.sysman.emas"
emcli list_patches_in_custom_plugin_update -plugin="oracle.sysman.xa" -discovery
Now, any new agent deployed from console or emcli, even though you forget to use clone feature will make sure the latest Agent System patches are picked up from default patch locations and plugins deployed will make sure the patches contains for plugins as they are the default plugins now.
References:
Applying Enterprise Manager Recommended Patches (Doc ID 1664074.1)
Oracle Recommended Patches (PSU) for Enterprise Manager Base Platform (All Releases) (Doc ID 822485.1)
Document 2038446.1 - Enterprise Manager 12.1.0.5.0 (PS4) Master Bundle Patch List
Enterprise Manager Cloud Control 12c Recommended Plug-Ins and Patches for Database as a Service (DBaaS) (Doc ID 1549855.1)
Enterprise Manager for Exadata 12.1.0.6.0 Bundle Patch Bug List (Doc ID 1929659.1)
Patch Requirements for Setting up Monitoring and Administration for Exadata (Doc ID 1323298.1)
http://oraforms.blogspot.ca/2014/05/oracle-em12c-release-and-patch-schedules.html
https://blogs.oracle.com/oem/entry/simplified_agent_and_plug_in
[EM-01901] Internal error in EM Patch Advisor for Patchng using EM12cR5
I am trying to patch the DB 12.1.0.2.160419 ( APR2016_PSU ) on OEL 6 with Patch 20807398 from Note:2034610.1 using EM12cR5.
OMS side Patches
Agent Side Patches
OMS PSU APR Patch: 22570344
OMS System Side Bundle Patch: 23218275
Patch: BUG:21364690
Agent-Side 12.1.0.5.160531: (May 31, 2016) Patch 23124338
Agent-Side Monitoring 12.1.0.8.160531:(May 31, 2016) Patch 23217639
* Agent-Side Discovery 12.1.0.8.5: (November 30, 2015) Patch 22135601
I get the below error, which is pointing to OMS HOME, I am analyzing Patch 20807398 on a DB Home!
EMlogs shows following exception:
2016-06-21 02:21:29,930 [RJob Step 115760] FATAL patch.InitSADB logp.251 - [EM-01901] Internal error in EM Patch Advisor
java.lang.NumberFormatException: For input string: "6000000000093016041902"
at java.lang.NumberFormatException.forInputString(NumberFormatException.java:48)
at java.lang.Long.parseLong(Long.java:422)
at java.lang.Long.valueOf(Long.java:525)
I have reviewed these notes:
ERROR: CHK-012: An Unexpected Exception Occurred when Patching Database (Doc ID 1951435.1)
EM 12c: Enterprise Manager 12c Cloud Control Patch Plan Fails when Checking Target Properties with Error: [EM-01901] Internal error in EM Patch A (Doc ID 1946028.1)
Solution:
Download the patch manually to SoftwareLibrary , seems like this issue is with downloading patch automatically from EM.
Patch analysis fails at step "Target Status" and at "Build Target Patch" for EM12cR5 GI+DB APR2016 Patches
Requirement:
Patch to be applied for DB+GI for 12.1.0.2 using EM Patch Automation
Description DB PSU GI PSU Proactive Bundle Patch APR2016 22291127 (12.1.0.2.160419) 22646084 (12.1.0.2.160419) includes 22291127 22899531 - 1.7GBFrom <https://support.oracle.com/epmos/faces/DocumentDisplay?_afrLoop=417353674774707&id=1454618.1>
Reference Notes:
DB Patches:
12.1.0.2 Patch Set Updates - List of Fixes in each PSU (Doc ID 1924126.1)12.1.0.2 Patch Set - Availability and Known Issues (Doc ID 1683799.1)Quick Reference to Patch Numbers for Database PSU, SPU(CPU), Bundle Patches and Patchsets (Doc ID 1454618.1)From <http://oraforms.blogspot.com/2015/09/em12c-12105-upgrade-tasks.html> EM12c Patches:
Applying Enterprise Manager 12c Recommended Patches (Doc ID 1664074.1)
From <http://oraforms.blogspot.com/2015/09/em12c-12105-upgrade-tasks.html>
Enterprise Manager 12.1.0.5.0 (PS4) Master Bundle Patch List (Doc ID 2038446.1)
Enterprise Manager Patches required for setting up Provisioning, Patching and Cloning (Deployment Procedures) (Doc ID 427577.1)
System Details:
EM 12.1.0.5 DB Plugin 12.1.0.8
OMS side Patches Agent Side Patches OMS PSU APR Patch: 22570344
OMS System Side Bundle Patch: 23218275
Patch: BUG:21364690
Agent-Side 12.1.0.5.160531: (May 31, 2016) Patch 23124338
Agent-Side Monitoring 12.1.0.8.160531:(May 31, 2016) Patch 23217639
* Agent-Side Discovery 12.1.0.8.5: (November 30, 2015) Patch 22135601
Steps Taken:
1. We started with GRID Infrastructure PSU APR2016 Patch in the lab cluster 22646084 (12.1.0.2.160419).
During the EM Patch analysis we encountered mismatch between the targets configuration info collected from “EM Repository from agent” with “oplan” tool of OPatch.
Similar Bug(this issue HAS having smallcase and UPPERcase with EM collection and Oplan collection, customer had uppercase shortname host in /etc/hosts)
BUG 20323468 - Run Configuration Compare fails with - invalid instances monitored by EM -> BUG 21258331 - CONFIGURATIONCOMPARE SHOULD BE CASE INSENSITIVE REGARDING THE HOSTNAME
In our case we were seeing the discrapancies in targetname with FQDN and shortname
2. We then tried DB PSU 22291127 (12.1.0.2.160419), which failed in the step ‘Target Status Check’ which we determined as concurrency issue- we were able to overcome this by removing additional ClusterDBService and Patch analysis was successful for DB side patch only. We decided to create one more ClusterDBService to test again this DB PSU. If we retry this step one by one on each node we can overcome this concurrency.
Erros:Another datapatch session is currently running.
Waiting for that session to complete before continuing...
Queryable inventory could not determine the current opatch status.
Execute 'select dbms_sqlpatch.verify_queryable_inventory from dual' and/or check the invocation log /ora01/app/oracle/cfgtoollogs/sqlpatch/sqlpatch_54049_2016_06_16_14_37_26/sqlpatch_invocation.log for the complete error.
Prereq check failed, exiting without installing any patches.
Error Codes:ORA-20009: Job Load_opatch_inventory_1execution failedWe have a somewhat workaround, but to fully automate we need fix for:
a. BUG 22204310 - CANNOT INVOKE DATAPATCH -PREREQ IN A CONCURRENT FASHION
b. Bug 19178275 - fixes concurrent access to QI when multiple DBs access it in a shared OH - is not backported yet
c. Bug 20879709 - concurrency with dbms_qopatch apis with fixed table implementation - is not backported yet
3. We again tried troubleshooting GI PSU, we are able to find the root cause, as 2 of the nodes were referring to wrong Oracle Central Inventory. Where the EM patch analysis was failing during compare configuration step. We fixed this.
The GI PSU Patch plan failed at the last step: In the EMOMS.log related errors as:
2016-06-15 15:46:35,246 [RJob Step 250083] ERROR dpGenerator.MultiPatchProcessor logp.251 - 22646084{, root=/%emd_emstagedir%/p22646084_600000000009300_226_0/oracle, oracle=/%emd_emstagedir%/p22646084_600000000009300_226_0/oracle} 2
2016-06-15 15:48:26,137 [RJob Step 250083] ERROR dpIntg.BuildPrereqProcAndConfig logp.251 - Exception while building the prerequisite procedure
oracle.oplan.sdk.oplan.OPlanInternalException: Unsupported Action Type:oracle.opatch.system.automation.jaxb.CommandAction subtype:preRACPatchApplyshell
Error: oracle.opatch.system.automation.jaxb.CommandAction subtype:preRACPatchApplyshell
Analysis:
The first hit you get on this issue is: Bug 21919097 : The Prerequsite Checks Required by OPlan Fails With Unsupported Action Type - Closed as not a bug due to issue in-à BUG 20950255 - UNABLE TO APPLY APR PSU VIA EM - FAILS AT ANALYSIS AND UNABLE TO PROCEED -- This is fixed in EM DB Plugin 12.1.0.8 ---- Which we have already applied
Another, fix which is required for this issue is in Patch:
Patch 21364690: Tracking bug to deliver one-off patch for oplan bugs 20978207 and 20995318 DB Plugin (OMS) 12.1.0.8.0
Action: Fix available at: https://support.oracle.com/epmos/faces/PatchDetail?requestId=19551356&_afrLoop=418222758860502&patchId=21364690&_afrWindowMode=0&_adf.ctrl-state=n3gg18298_1124 – We need to apply this patch
Summary:
We have two issue here:
4. Concurrency issue with “Target Status Check” step – We can check with support whether its related and get fixes for the BUGS: BUG 22204310, Bug 19178275 and 20879709
5. GI PSU failing in last but one step - “building the prerequisite procedure “ - we applied the fix for 21364690 and it fixed the issue.
Getting MultiPath Failed Status count using EM12c/EM13c Metric Extension
Customer has requirement to alert if the multipath count goes down from 4.
Command to get the count as privileged User:
Metric Extension Examples:
How to monitor Weblogic correct HEALTH STATE using EM12c Metric Extension
Monitoring BRM Host Processes using Metric Extension in EM12c
Monitoring the Filesystem for READONLY mounts using Metric Extension in OEM12c
Em12c Creating Metric Extension(User Defined Metrics) for BPEL Process State OFF
Creating an Enterprise Manager Metric Extension to monitor Huge Page Allocation
Oracle DBaaS CookBook using EM12c : MyNotes
Cloud/Super Administrator Tasks (EM CLOUD ADMIN Role)
Step 1: Decide with Architects and Cloud decision makers about the Service Catalog offerings
Business Catalog->Technical Catalog -> Service Catalog ( May be Subset of Technical Catalog)
A company can provide the Bronze and Silver tier in the self-service model but choose to deploy the Gold and Platinum tiers using native Oracle Enterprise Manager 12c capabilities.
Platinum Tier, should be implemented in its own reference architecture. In some cases, companies elect to provision these tiers using Oracle Enterprise Manager 12c native capabilities, as opposed to self-service
Step 2: Configure Software Library
Step 3: Deploy the necessary plug-ins. See Section 3.2, "Deploying the Required Plug-ins"
Step 4: Install the Management Agent on unmanaged hosts so that they can be monitored by Enterprise Manager. See Section 11.2.1, "Adding Hosts".
Step 5: Configure Privilege Delegation for Database Servers Setup > Security > Privilege Delegation Configuring Privilege Delegation Settings
Step 6: Define Named Credentials Setup > Security > Named Credentials. Defining Roles and Assigning Users
In a DBaaS implementation the configuration of the named and preferred credentials is critical. In larger implementations of DBaaS, the preferred credentials are vital especially when using automation using emcli or when using the cloud framework in conjunction to the lifecycle management pack.
Step 7: Creating Cloud Users and Roles Setup > Security > Roles.
Quotas are assigned at the role level and users should be assigned to the roles based on the desired limits.
MYPROJECT_SSA_DB_DEV_USER_ROLE [ EM_SSA_USER is assigned to this role, also EM_USER and Public ]
MYPROJECT_SSA_DB_PROD_USER_ROLE
Note: EM_CLOUD_ADMINISTRATOR(SYSMAN), EM_SSA_ADMINISTRATOR (SYSMAN), and EM_SSA_USER roles must have been created https://docs.oracle.com/cd/E63000_01/EMCLO/cloud_paas_setup.htm#EMCLO323>
Step 8: Create Self Service Portal Users Setup >Security >Administrators.
MYPROJECT_CLOUD_USER as an example user or assign MYPROJECT_SSA_USER_ROLE to all MYPROJECT_DBA_USERS AD Group.
Step 9: Defining Databases Zones Setup > Cloud > PaaS Infrastructure Zones http://docs.oracle.com/cd/E24628_01/doc.121/e28814/cloud_paas_setup.htm#CHDBIBGB
Define and create zones to satisfy the Reference Architecture Design.
1. DataCenter- A - Primary [ MYPROJECT_PaaS_DBZone_Primary_A ]
2. DataCenter -B - Standby [ MYPROJECT_PaaS_DBZone_STandBy_B ]
Can be based on Geography (East/West),Lifecycle(Prod/Dev) or Functional ( ERP, DB, Siebel etc)
Placement Policy is maximum constraint for CPU and Memory on these Hosts
Refer: Adding Hosts and Creating a PaaS Infrastructure Zone
DBaaS Administrator Tasks (EM_SSA_ADMIN)
Step 10: Define Database Sizes: [ Only emcli option ]
emcli create_database_size -name=Small -description="Small size database" -attributes="cpu:2;storage:2;memory:1;processes:350"
emcli create_database_size -name=Medium -description="Medium size database" -attributes="cpu:3;storage:3;memory:1;processes:500"
emcli create_database_size -name=Large -description="Large size database" -attributes="cpu:4;storage:4;memory:2;processes:700"
Step 11: Defining Database Pools Setup >Cloud > Database and select "Database Pools"
a) Database pool name (select a distinct name that describes purpose of the pool in this example: DataCenter-A Linux64-11202-SI,
b) Provide Global credentials for an Oracle named credential. In this case, the grid and root credentials are optional,
c) Select the Hosts and database homes that will define the pool,
d) Select the PaaS Infrastructure Zone, Platform, database configuration and database version to be installed in the pool.
Step 12: Request Settings Setup >Cloud > Database and select "Request Settings" ( All settings at self service level)
• The amount of time in advance the self service user can schedule a request.
• The maximum amount of time for which a self service user can retain the instance.
• The amount of time after the completed self service create requests will be purged from the repository.
Step 13: Quotas Setup >Cloud > Database and select "Quotas" ( all settings at Role Level)
Using the Quota, the cloud administrator is able to assign to roles the following:
1. The amount of memory all the users assigned to the roles can consume.
2. The amount of storage all the users assigned to the roles can consume.
3. The number of databases all the users assigned to the roles can request.
4. The number of schema requests all the users assigned to the roles can request.
5. The number of Pluggable database requests all the users assigned to the roles can request.
Step 14: Defining Service Templates for Self Service Provisioning Setup >Cloud > Database and select "Profiles and Service Templates"
NOTE: Provide as much as details in description this is what SSA_USERS see when they request
Cloud DBaaS User Tasks [EM_SSA_USER is assigned to this role, also EM_USER and Public]
Step 15: Using Self Service Portal Enterprise > Cloud > Self-Service Portal or If the user has only SSA then when he logins he gets SSA Portal only not the normal view
Reference:
http://www.oracle.com/technetwork/oem/sys-mgmt/wp-em12c-monitoring-strategies-1564964.pdf
http://www.oracle.com/technetwork/oem/cloud-mgmt/dbaas-more-info-2394630.html
http://docs.oracle.com/cd/E24628_01/doc.121/e28814/toc.htm
YouTube:
What is Oracle Cloud Management Pack in Enterprise Manager Cloud Control?
- Oracle Cloud Management Pack for Oracle Database
- Oracle Cloud Management Pack for Oracle Fusion Middleware
- Oracle Cloud Management Pack for Testing
Without these packs we cannot use any self-service provisioning features.
With DBLM you can use Deployment Procedure to create/clone new DB’s but you cannot use self-service portal.
The traditional DB LifeCycle Management provides all the management of DB but there are some exception of features like below:
Note: The ability to create 'new' full clones is licensed under Database Lifecycle Management Pack for Oracle Database, but the additional 'refresh' function requires licensing the Cloud Management Pack for Oracle Database.


Let us discuss a Scenario where Customer may require Hybrid Cloud Management capabilities:
Customer OMS is running on-premise and they have some cloud services subscriptions also.
If they just want to manage their cloud service targets they can use Hybrid Agent to manage making sure they have the traditional license pack for those targets to have single pane of view of all their on-premise traditional targets and Cloud targets.
They can also use the REST API to manage and view their cloud services which comes with cloud service offerings.
If the customer is not going to build any in-house private cloud service ( MWaaS, DBaaS, IaaS, PaaS, SCHaaS, SnapClone etc…) using OEM, they may not require Cloud Management packs.
Cloud Management pack provides top up features to their traditional packs.
Oracle Cloud Management Pack for Oracle DatabasePrerequisitesThe Oracle Cloud Management Pack for Oracle Database requires the Database Lifecycle Management Pack for Oracle Database.
As of now to to raise a request to create an instance of DBCS or JCS on Oracle Cloud you have to use REST API or Cloud UI.
Hope we will soon have integration in OEM cloud management pack capability to raise service request directly against Oracle Cloud Service ( Cloud service hosted at Oracle Data center or at customer as Private Cloud Service)
which will create an instance in cloud and will discover the assets and manage in OEM .
Timeout Values for Enterprise Manager Components
There are browser plugins which refreshes the current page automatically for the mentioned frequency. Try this approach first.
I searched “browser plugin to refresh page”
The EM components which affects timeout are:
http://docs.oracle.com/cd/E63000_01/EMADM/appdx_timeout_settings.htm#EMADM15477
ComponentDescriptionTimeout Value (in minutes)CommandApache timeoutNumber of seconds that an Apache session is kept active.
If Apache timeout is set beyond the operating system TCP timeout, it will cause unpredictable results. The operating system timeout is set to 2 hours by default.5 mins by defaultRun the following command:
$ omsvfy show tcp
Parameters Incoming Value
--------------------
tcp_keepalive_time 7200
tcp_keepalive_intvl 75
tcp_fin_timeout 60
--------------------
OMS timeout or Login timeoutThis is theoracle.sysman.eml.maxInactiveTimeparameter that can be set per OMS. To prevent unauthorized access to the Cloud Control, Enterprise Manager will automatically log you out of Cloud Control when there is no activity for a predefined period of time. For example, if you leave your browser open and leave your office. This default behavior prevents unauthorized users from using your Enterprise Manager administrator account.
If you make changes to the login timeout value, be sure to consider the security implications of leaving your session open for other than the default timeout period.
Note: The default timeout value does not apply when you restart the Web server or the OMS. In both of those cases, you will be asked to log in to the Cloud Control Console, regardless of the default timeout value.
45 min by defaultRun the following command: emctl set property -name oracle.sysman.eml.maxInactiveTime -value time_in_minutes -module emoms
Then, restart OMS for the value to take effect.ADF timeoutThis is controlled by the variableoracle.adf.view.rich.poll.timeout. The variable applies to pages that have auto poll. ADF pages may be enabled with automatic poll. After a page does not receive any keyboard or mouse event for duration oforacle.adf.view.rich.poll.timeoutvariable, then the poll stops. From that point on, the page participates in the standard server-side session timeout.10 minNoneAt my previous project we used these values as per client requirements:
--We are setting to 2700 ---> 45minX60= 2700 Seconds
emctl set property -name oracle.sysman.eml.maxInactiveTime -value 2700
cd /u01/app/mw_12cR3/oms/sysman/archives/emgc/deployments/GCDomain/emgc.ear/em.war/WEB-INF
<!-- Workaround for Bug 18141467- CONFIGURE PERFORMANCE HOME PAGE TIMEOUT
You need to specify the value in milliseconds. Setting to 40Minuites on OCT-23-2014 :
-->
<context-param>
<param-name>oracle.adf.view.rich.poll.TIMEOUT</param-name>
<param-value>2400000</param-value>
</context-param>
………………..
…………………
</web-app>
Also make sure the settings at Load Balancer is proper if they are using one.
Note:
- In case of multiple OMSs, this must be done on all OMSs.
- If the OMSs are behind a SLB, and if the SLB name is used in the URL provided to login to the EM Console, check the Whitepaper:
Enterprise Manager 12c Cloud Control - Configuring OMS High Availability with F5 BIG - IP Local Traffic Manager
Topic Create the Persistence Profiles - Change the values related to the Console
The value must be provided there in seconds (So 3600 for a timeout of 60 minutes).
12c OEM: Console Session Expires with "Because of inactivity, your session has timed out and is no longer active, Click OK to reload the page (Doc ID 1544516.1)
How to change EM 12c Performance Home page default timeout (Doc ID 1644004.1)
Step 6 & 7: Setup OMS for EM13c in VMware ESXi 6.0.0

Unzip all the files, and run em13100_linux64.bin which unzips the other files…into Disk<> folders.


If you want to run pre-Req check this:
./em13100_linux64.bin -silent EMPREREQ_KIT=true EMPREREQKIT_PROPERTY_FILE=/oracle/stage check.rsp -J-Djava.io.tmpdir=/oracle/stage
http://docs.oracle.com/cd/E63000_01/EMADV/install_em_exist_db_slnt.htm#EMADV109
From <http://www.redstk.com/saving-you-15-minutes-em13-1-blog-blitz-em-upgrade-pre-reqs/>
Also Refer:
https://oracle-base.com/articles/13c/cloud-control-13cr1-installation-on-oracle-linux-6-and-7
http://dbakevlar.com/2016/01/installing-a-new-enterprise-manager-13c-environment/
http://www.oracle.com/technetwork/oem/install-upgrade/pr-install-em13-2835293.pdf
https://oemgc.wordpress.com/2015/12/27/upgrade-em12c-to-em13c-this-is-what-i-did/
http://www.gokhanatil.com/2015/12/how-to-upgrade-oracle-enterprise-manager-cloud-control-12c-to-em13c.html


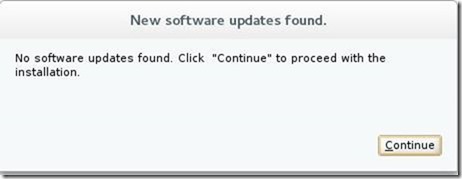
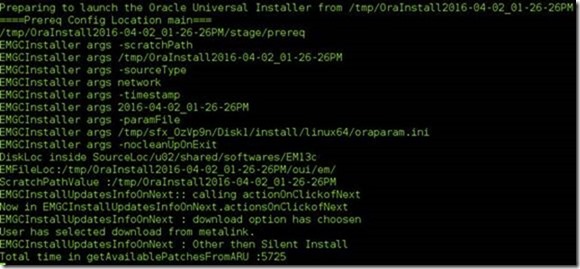


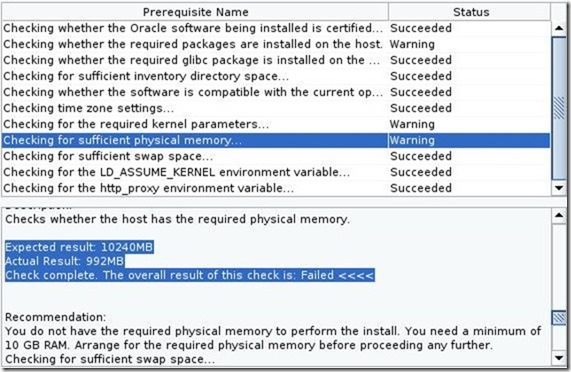


We ran into space issue where it required more disk space:
Allocate or resize disk size in Vsphere Client:

Reboot machine and login as Root:
fdisk -l
Create new Physical partition from the new space 10B added to previous 30GB.
fdisk /dev/sda
Command (m for help): n
Partition type:
p primary (2 primary, 0 extended, 2 free)
e extended
Select (default p): p
Partition number (3,4, default 3):
First sector (62914560-83886079, default 62914560):
Using default value 62914560
Last sector, +sectors or +size{K,M,G} (62914560-83886079, default 83886079):
Using default value 83886079
Partition 3 of type Linux and of size 10 GiB is set
Type:t choose:3
Choose: 8e to convert type Linux LVM
Changed type of partition 'Linux' to 'Linux LVM'
Choose:p
Save by choosing : w
http://www.howtogeek.com/howto/36568/what-is-logical-volume-management-and-how-do-you-enable-it-in-ubuntu/
http://www.howtogeek.com/howto/40702/how-to-manage-and-use-lvm-logical-volume-management-in-ubuntu/
https://www.rootusers.com/how-to-increase-the-size-of-a-linux-lvm-by-expanding-the-virtual-machine-disk/

Reboot the Machine:
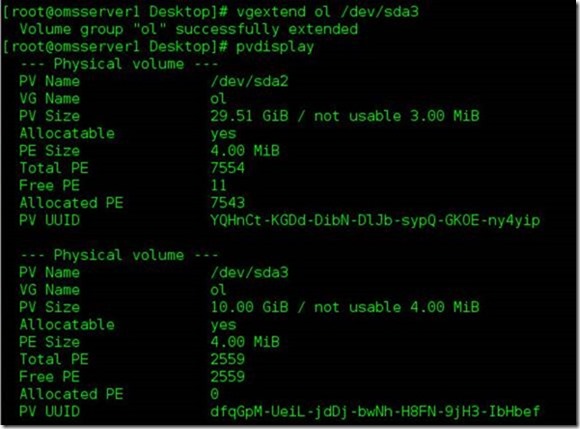
We will use : pvcreate, vgextend , lvextend and xfs_growfs to add this to our root partition '/'

#lvdisplay


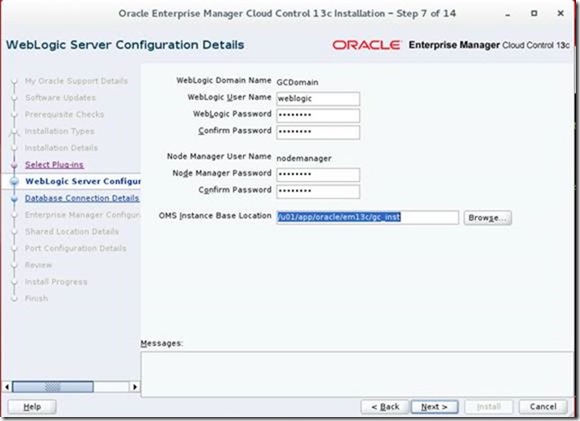
On 4/3/2016 available plugins:


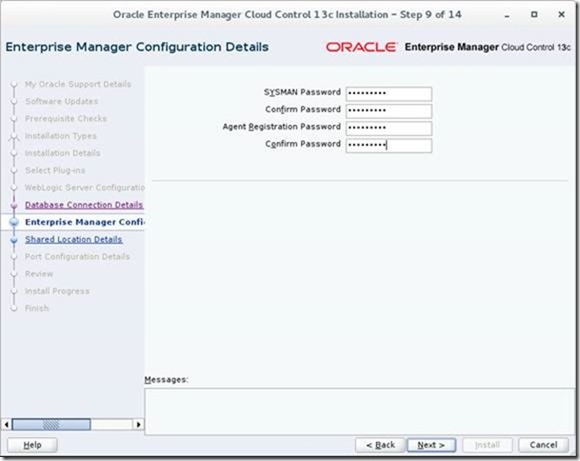


Now Make sure the ports are according to ports you have configured in F5 LieRate Load Balancer


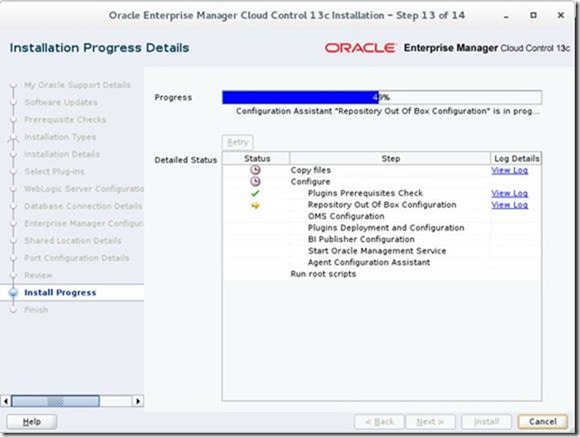
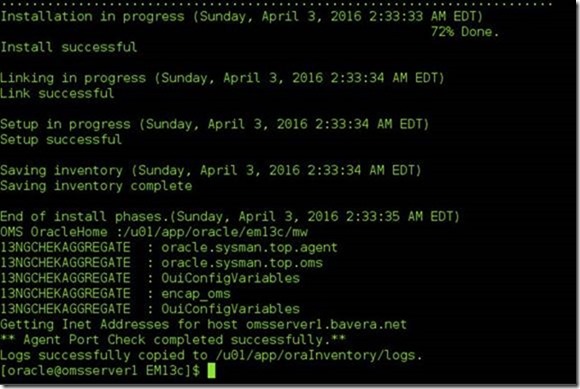
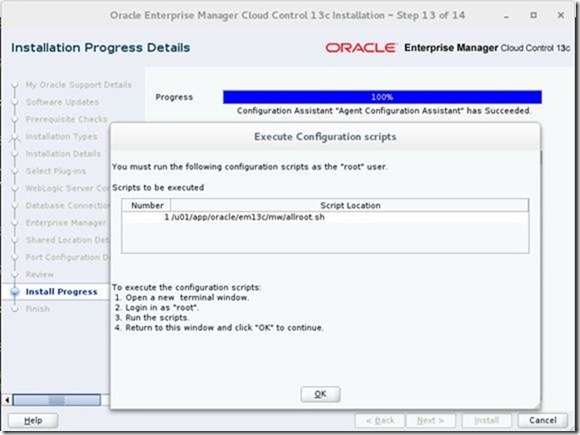


This completes installation on node1: omsserver1.bavera.net
Note: Enable all the HTTP Listen ports for Managed Server, Admin Server, BIP Server as we are using HTTP ports for Load Balancing.
Step:1 Enable HTTP ports using the Admin Console:
Step 2: Unlock Console and Upload port using emctl commands
emctl status oms -details
[oracle@omsserver1 ~]$ emctl status oms -details
Oracle Enterprise Manager Cloud Control 13c Release 1
Copyright (c) 1996, 2015 Oracle Corporation. All rights reserved.
Enter Enterprise Manager Root (SYSMAN) Password :
Console Server Host : omsserver1.bavera.net
HTTP Console Port : 7788
HTTPS Console Port : 7803
HTTP Upload Port : 4889
HTTPS Upload Port : 4900
EM Instance Home : /u01/app/oracle/em13c/gc_inst/em/EMGC_OMS1
OMS Log Directory Location : /u01/app/oracle/em13c/gc_inst/em/EMGC_OMS1/sysman/log
OMS is not configured with SLB or virtual hostname
Agent Upload is locked.
OMS Console is locked.
Active CA ID: 1
Console URL: https://omsserver1.bavera.net:7803/em
Upload URL: https://omsserver1.bavera.net:4900/empbs/upload
WLS Domain Information
Domain Name : GCDomain
Admin Server Host : omsserver1.bavera.net
Admin Server HTTPS Port: 7102
Admin Server is RUNNING
Oracle Management Server Information
Managed Server Instance Name: EMGC_OMS1
Oracle Management Server Instance Host: omsserver1.bavera.net
WebTier is Up
Oracle Management Server is Up
JVMD Engine is Up
BI Publisher Server Information
BI Publisher Managed Server Name: BIP
BI Publisher Server is Up
BI Publisher HTTP Managed Server Port : 9701
BI Publisher HTTPS Managed Server Port : 9803
BI Publisher HTTP OHS Port : 9788
BI Publisher HTTPS OHS Port : 9851
BI Publisher is locked.
BI Publisher Server named 'BIP' running at URL: https://omsserver1.bavera.net:9851/xmlpserver
BI Publisher Server Logs: /u01/app/oracle/em13c/gc_inst/user_projects/domains/GCDomain/servers/BIP/logs/
BI Publisher Log : /u01/app/oracle/em13c/gc_inst/user_projects/domains/GCDomain/servers/BIP/logs/bipublisher/bipublisher.log
[oracle@omsserver1 ~]$
=====================================================================================
Step 7: Register the SLB, Unlock HTTP upload and Console
We will use Self Signed Certificate:
openssl req -x509 -nodes -sha256 -days 3650 -newkey rsa:2048 -keyout em13c.bavera.net.key -out em13c.bavera.net.crt
openssl rsa -in em13c.bavera.net.key -text > em13c.bavera.net.key.pem
openssl x509 -inform PEM -in em13c.bavera.net.crt > em13c.bavera.net.crt.pem
openssl x509 -noout -text -in em13c.bavera.net.crt
Note: Same Certificate has been imported in SSL Profile for LineRate Load Balancer
[oracle@omsserver1 ~]$ emctl secure oms -host em13c.bavera.net -secure_port 4900 -slb_port 4900 -slb_console_port 443 -slb_jvmd_http_port 7202 -slb_bip_http_port 8080 -trust_certs_loc /home/oracle/em13c.bavera.net.crt.pem
Oracle Enterprise Manager Cloud Control 13c Release 1
Copyright (c) 1996, 2015 Oracle Corporation. All rights reserved.
Securing OMS... Started.
Enter Enterprise Manager Root (SYSMAN) Password :
Enter Agent Registration Password :
Securing OMS... Successful
Restart OMS
[oracle@omsserver1 ~]$
emctl secure oms -unlock_upload -unlock_console
emctl secure unlock -console -upload
[oracle@omsserver1 ~]$ emctl secure unlock -console -upload
Oracle Enterprise Manager Cloud Control 13c Release 1
Copyright (c) 1996, 2015 Oracle Corporation. All rights reserved.
Enter Enterprise Manager Root (SYSMAN) Password :
OMS Console is unlocked. HTTP ports too can be used to access console.
BI Publisher is unlocked. HTTP ports too can be used to access BI Publisher.
Agent Upload is unlocked. Unsecure Agents may upload over HTTP.
Restart OMS.
emctl stop oms -all;emctl start oms
Verify the Load Balancer and Certificates:
emctl secdiag openurl -url https://em13c.bavera.net/empbs/upload
-------------------------------------------------------------------------------------------------------------------------------------------
[oracle@omsserver1 config]$ emctl status oms -details
Oracle Enterprise Manager Cloud Control 13c Release 1
Copyright (c) 1996, 2015 Oracle Corporation. All rights reserved.
Enter Enterprise Manager Root (SYSMAN) Password :
Console Server Host : omsserver1.bavera.net
HTTP Console Port : 7788
HTTPS Console Port : 7803
HTTP Upload Port : 4889
HTTPS Upload Port : 4900
EM Instance Home : /u01/app/oracle/em13c/gc_inst/em/EMGC_OMS1
OMS Log Directory Location : /u01/app/oracle/em13c/gc_inst/em/EMGC_OMS1/sysman/log
SLB or virtual hostname: em13c.bavera.net
HTTPS SLB Upload Port : 4900
HTTPS SLB Console Port : 443
HTTP SLB JVMD Port : 7202
Agent Upload is unlocked.
OMS Console is unlocked.
Active CA ID: 1
Console URL: https://em13c.bavera.net:443/em
Upload URL: https://em13c.bavera.net:4900/empbs/upload
WLS Domain Information
Domain Name : GCDomain
Admin Server Host : omsserver1.bavera.net
Admin Server HTTPS Port: 7102
Admin Server is RUNNING
Oracle Management Server Information
Managed Server Instance Name: EMGC_OMS1
Oracle Management Server Instance Host: omsserver1.bavera.net
WebTier is Up
Oracle Management Server is Up
JVMD Engine is Up
BI Publisher Server Information
BI Publisher Managed Server Name: BIP
BI Publisher Server is Up
BI Publisher HTTP Managed Server Port : 9701
BI Publisher HTTPS Managed Server Port : 9803
BI Publisher HTTP OHS Port : 9788
BI Publisher HTTPS OHS Port : 9851
BI Publisher HTTPS SLB Port : Not Set
BI Publisher HTTP SLB Port : 8080
BI Publisher is unlocked.
BI Publisher Server named 'BIP' running at URL: https://em13c.bavera.net:9851/xmlpserver
BI Publisher Server Logs: /u01/app/oracle/em13c/gc_inst/user_projects/domains/GCDomain/servers/BIP/logs/
BI Publisher Log : /u01/app/oracle/em13c/gc_inst/user_projects/domains/GCDomain/servers/BIP/logs/bipublisher/bipublisher.log
[oracle@omsserver1 config]$
--------------------------------------------------------------------------------------------------------------------------------
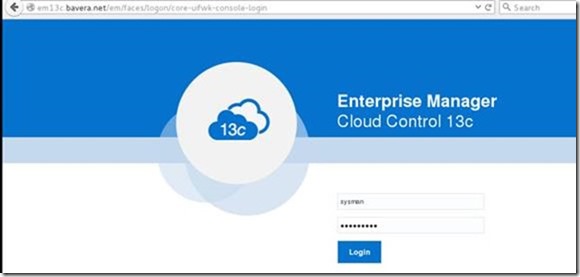
Resecure/Unsecure the Agents with this new Load Balancer Host and HTTP Repository URL:
Cd $AGENT_HOME
./emctl secure agent -emdWalletSrcUrl https://em13c.bavera.net:4900/empbs/wallets/emd
If you want to Unsecure
./emctl unsecure agent
Goto sysman/config -> open emd.properties change the
REPOSITORY_URL= http://em13c.bavera.net:4889/empbs/upload/
Restart agent
Step:11 Add additional OMS on server omsserver2.bavera.net
Refer: http://docs.oracle.com/cd/E63000_01/EMBSC/install_addln_oms.htm#EMBSC177
Add the additional Agent on server2:

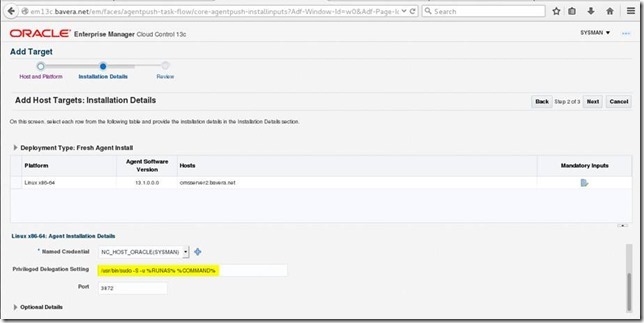

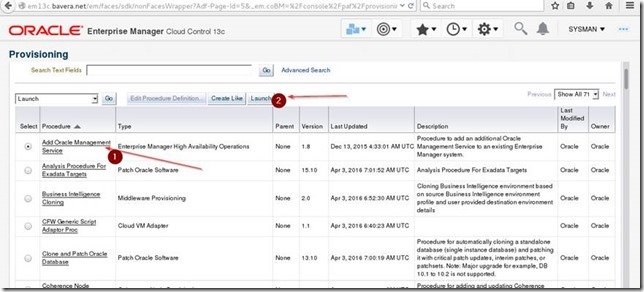
Add the Additional OMS using the "Add Oracle Management Service" Deployment Procedure (preferred method)
From <http://docs.oracle.com/cd/E63000_01/EMADV/ha_setup.htm#EMADV14396>
http://docs.oracle.com/cd/E63000_01/EMBSC/install_addln_oms.htm#EMBSC171


(Current OMS Count + 1) x Processes Parameter Value Per OMS for the Current Deployment Size
SMALL, then the Processes parameter value to be set is computed this way: (1 + 1) x 300 = 600.
PROCESSES = 600
SESSIONS = (1.1 * PROCESSES) + 5
TRANSACTIONS = 1.1 * SESSIONS
alter system set processes = 600 scope = spfile;
alter system set sessions = 660 scope = spfile;
alter system set transactions = 726 scope = spfile;
shutdown immediate;
startup;
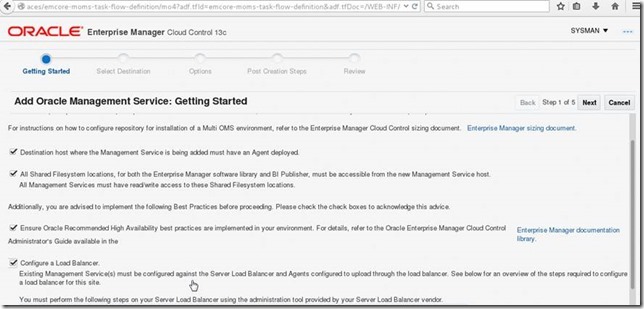


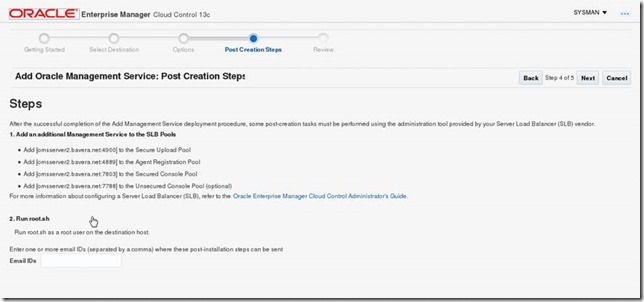


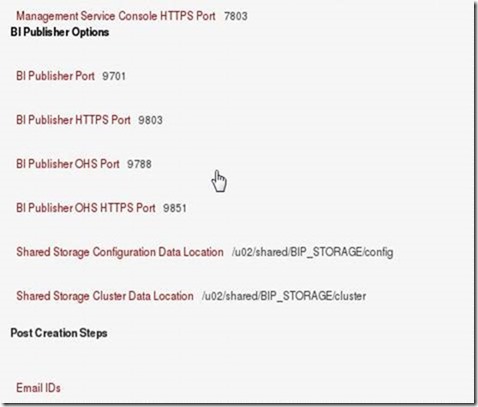

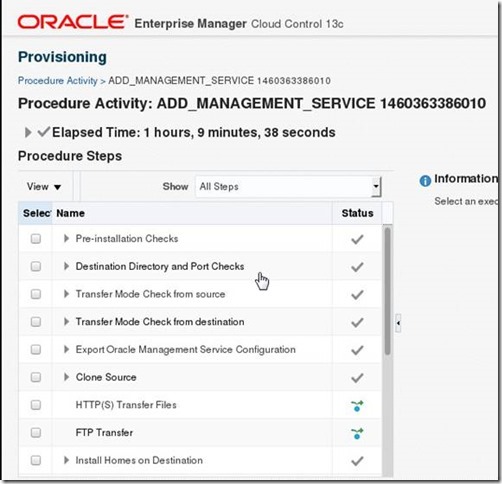
Note: I had allocated 1GB RAM for this VM, which would have caused delay in deployment. I eventually increased it to 10GB

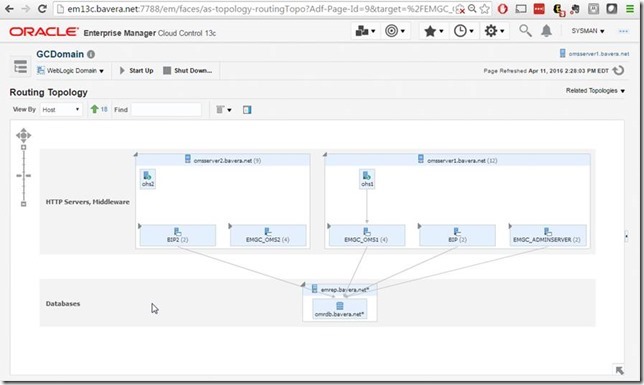
Step 5: Install the OMR Database12c for EM13c
Download: http://www.oracle.com/technetwork/oem/enterprise-manager/downloads/db-templates-2767916.html
Install Document: http://docs.oracle.com/cd/E63000_01/EMBSC/appdx_seed_db_template.htm#EMBSC242
Create the clone of VM from omsserver2 and save as "192.168.50.50 emrep.bavera.net emrep"


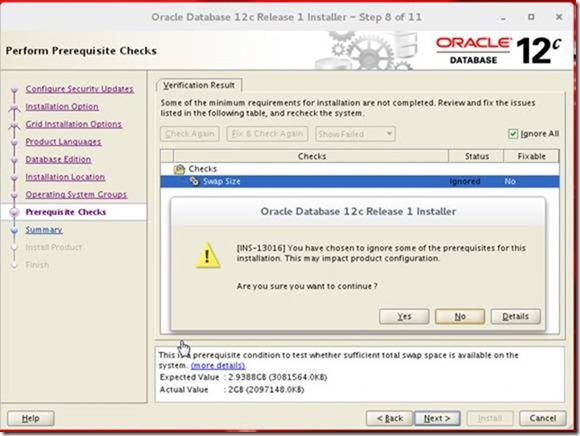


Use the DB Template downloaded from OTN to create the OMR Database.
Extract the 12.1.0.2.0_Database_Template_for_EM13_1_0_0_0_<platform>.zip file to the following location on the database host.
$<DB_HOME>/assistants/dbca/templates
For example,
/u01/software/oracle/database/dbhome_1/assistants/dbca/templates

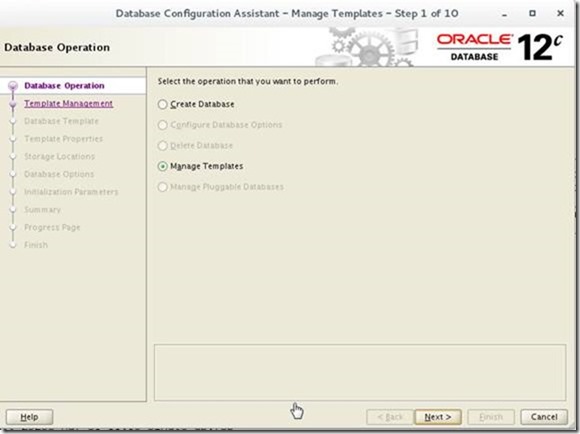


12.1.0.2.0_Database_Template_for_EM13_1_0_0_0_Small_deployment.dbc
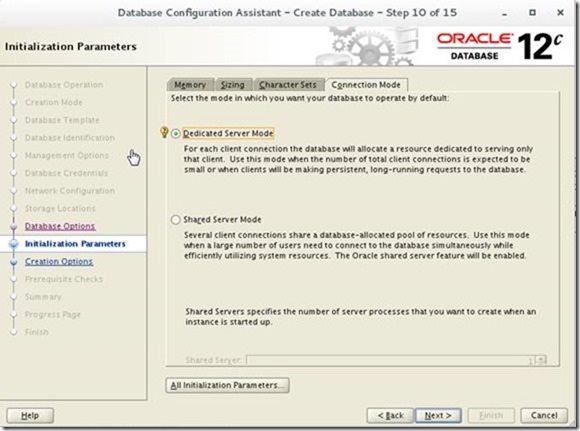
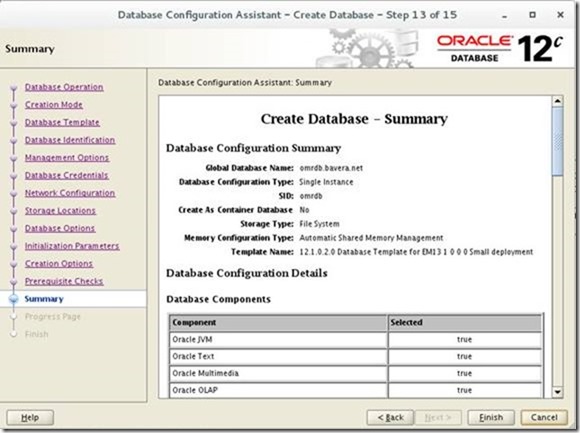
Database Components Component Selected Oracle JVM true Oracle Text true Oracle Multimedia true Oracle OLAP true Oracle Spatial true Oracle Label Security true Sample Schemas false Oracle Application Express true Oracle Database Vault true
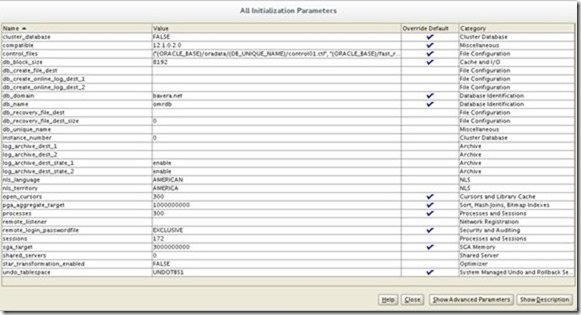
Initialization Parameters Name Value audit_file_dest {ORACLE_BASE}/admin/{DB_UNIQUE_NAME}/adump audit_trail DB cluster_database FALSE compatible 12.1.0.2.0 control_files ("{ORACLE_BASE}/oradata/{DB_UNIQUE_NAME}/control01.ctl", "{ORACLE_BASE}/fast_recovery_area/{DB_UNIQUE_NAME}/control02.ctl") db_block_size 8192 db_name diagnostic_dest {ORACLE_BASE} dispatchers (PROTOCOL=TCP) (SERVICE={SID}XDB) open_cursors 300 parallel_max_servers 8 parallel_min_servers 0 pga_aggregate_target 1000000000 processes 300 remote_login_passwordfile EXCLUSIVE session_cached_cursors 200 sga_target 3000000000 undo_tablespace UNDOTBS1
Character Sets Name Value Database Character Set WE8MSWIN1252 National Character Set AL16UTF16
Data Files Name Tablespace Size(M) {ORACLE_BASE}/oradata/{DB_UNIQUE_NAME}/mgmt_ad4j.dbf MGMT_AD4J_TS 200 {ORACLE_BASE}/oradata/{DB_UNIQUE_NAME}/mgmt_depot.dbf MGMT_ECM_DEPOT_TS 40 {ORACLE_BASE}/oradata/{DB_UNIQUE_NAME}/mgmt.dbf MGMT_TABLESPACE 1300 {ORACLE_BASE}/oradata/{DB_UNIQUE_NAME}/sysaux01.dbf SYSAUX 680 {ORACLE_BASE}/oradata/{DB_UNIQUE_NAME}/system01.dbf SYSTEM 1020 {ORACLE_BASE}/oradata/{DB_UNIQUE_NAME}/undotbs01.dbf UNDOTBS1 1150 {ORACLE_BASE}/oradata/{DB_UNIQUE_NAME}/users01.dbf USERS 5 {ORACLE_BASE}/oradata/{DB_UNIQUE_NAME}/temp01.dbf TEMP 2318
Control Files Name {ORACLE_BASE}/oradata/{DB_UNIQUE_NAME}/control01.ctl {ORACLE_BASE}/fast_recovery_area/{DB_UNIQUE_NAME}/control02.ctl
Redo Log Groups Group Size(K) 1 296960 2 296960 3 296960


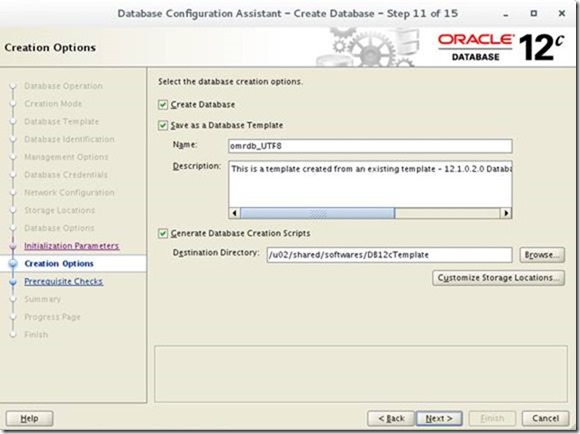
Note: remember to choose UTF8



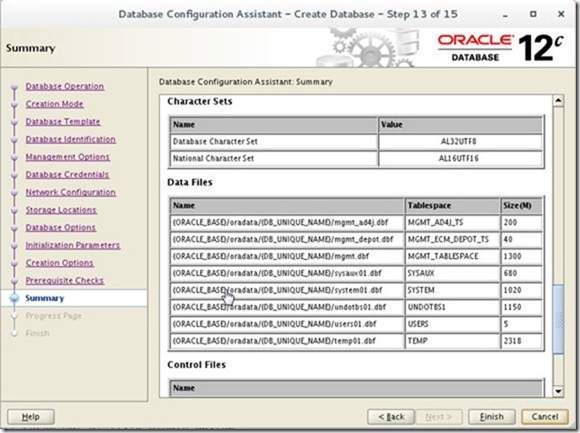


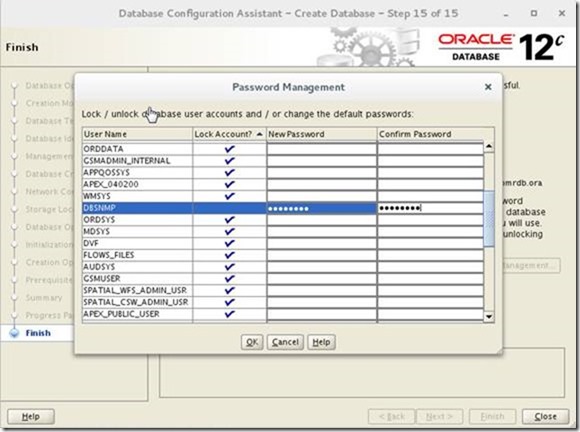
Afte the install make sure firewall is disabled as it is lab or enable 1521 manually in firewall rules for required Hosts
# systemctl stop firewalld
# systemctl disable firewalld
Removed symlink /etc/systemd/system/dbus-org.fedoraproject.FirewallD1.service.
Removed symlink /etc/systemd/system/basic.target.wants/firewalld.service.

Apply latest DB Patchset: refer Document Version Download link Included in Windows Bundle 21948354.8 12.1.0.2.160119 (Jan 2016) Database Patch Set Update (DB PSU) Patch:21948354 12.1.0.2 Patch 160119
From <https://support.oracle.com/epmos/faces/DocumentDisplay?_afrLoop=91031286431995&id=1924126.1&_afrWindowMode=0&_adf.ctrl-state=jzzx3wr43_94>
Step 3 & 4: Setup Load Balancer LineRate from F5 for EM13c
Download: https://linerate.f5.com/try/download
Doc: https://support.f5.com/kb/en-us/products/linerate/versions.2-6-1.html
http://linuxpoison.blogspot.com/2008/09/opensource-load-balancing-software.html
EM12cR5 - http://docs.oracle.com/cd/E24628_01/install.121/e24089/ha_setup.htm#EMADV14386
EM13c - https://docs.oracle.com/cd/E63000_01/EMADV/ha_setup.htm#EMADV11590


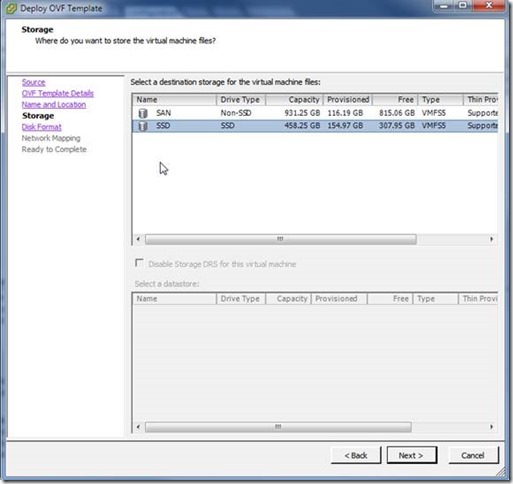
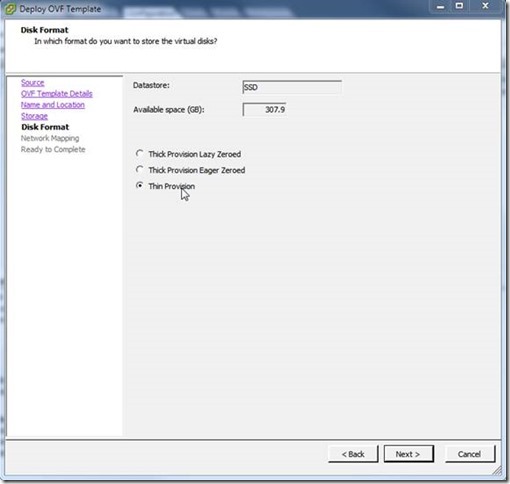


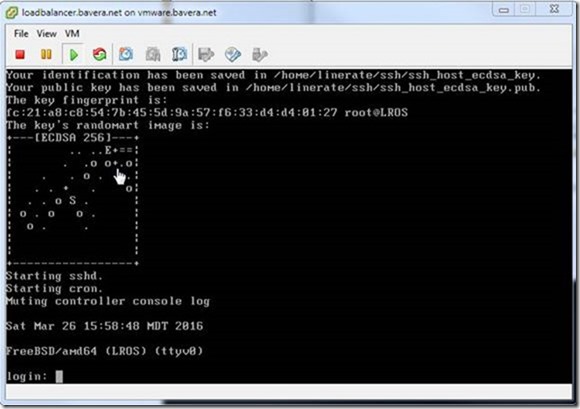

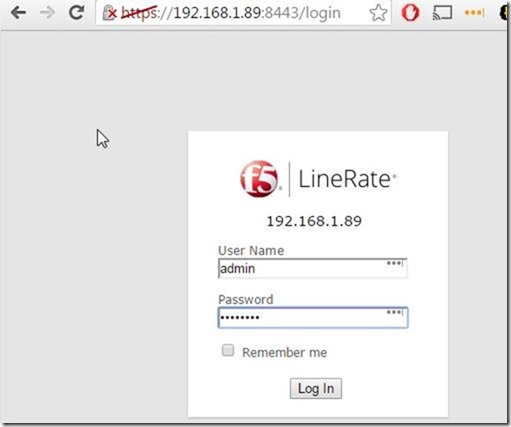
Account: admin/changeme
https://192.168.1.89:8443

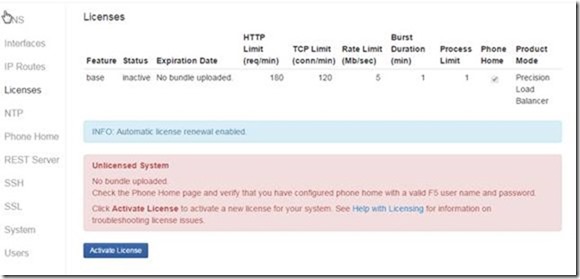
Put Phone Home Details with your F5 account and resubmit active license:


Change password: type
configure
username admin secret "<password>"
write
Assign the IP address:

Change the Hostname:
LROS(config)# configure
LROS(config)# hostname loadbalancer.bavera.net
*loadbalancer.bavera.net(config)# write
Building configuration...
[OK]
*loadbalancer.bavera.net(config)#show run
Step 4: Configure your Load Balancer for EM13c
From <https://docs.oracle.com/cd/E63000_01/EMADV/ha_setup.htm#EMADV11590> for EM13c
https://192.168.1.89:8443/lrs/api/v1.0/status/app/proxy/stats/data/realServer/ccuc_omsserver1
https://docs.oracle.com/cd/E63000_01/EMADV/ha_setup.htm#EMADV11590
Monitors we will be using: Cloud Control Service TCP Port Monitor Name Type Interval Timeout Send String Receive String Secure Console (when not using SSO) 7799 mon_ccsc https 5 16 GET /em/consoleStatus.jsp HTTP/1.1\r\nHost: \r\nConnection: Close \r\n\r\n Enterprise Manager Console is UP Secure Console (when using SSO) 7799 mon_ccsc https 5 15 GET /empbs/genwallet \r\n GenWallet Servlet activated Unsecure Console (when not using SSO) 7788 mon_ccuc http 5 16 GET /em/consoleStatus.jsp HTTP/1.1\r\nHost: \r\nConnection: Close \r\n\r\n Enterprise Manager Console is UP Unsecure BI Publisher Console 9788 mon_ccucbip http 5 16 GET /xmlpserver/services HTTP/1.1\r\nHost: \r\nConnection: Close \r\n\r\n And now... Some Services Secure Upload 4900 mon_ccsu https 60 181 GET /empbs/upload \r\n Http Receiver Servlet active! Agent Registration 4889 mon_ccar http 60 181 GET /empbs/genwallet \r\n GenWallet Servlet activated Always-On Monitoring Secure Upload 8081 mon_ccaom https 60 181 GET /upload \r\n Always On Monitoring is active
F5 LineRate Equivalent configure CLI commands: configure
health-monitor mon_ccuc
interval 5
timeout 16
server-down "8/10"
server-up "9/10"
type http
request-method GET
request-target "/em/consoleStatus.jsp"
admin-status online
write
configure
health-monitor mon_ccucbip
interval 5
timeout 16
server-down "8/10"
server-up "9/10"
type http
request-method GET
request-target "/xmlpserver/services"
admin-status online
write
configure
health-monitor mon_ccsu
interval 60
timeout 181
server-down "8/10"
server-up "9/10"
type http (value same for https)
request-method GET
request-target "/empbs/upload"
admin-status online
write
configure
health-monitor mon_ccar
interval 60
timeout 181
server-down "8/10"
server-up "9/10"
type http
request-method GET
request-target "/empbs/genwallet"
admin-status online
write
configure
health-monitor mon_ccaom
interval 60
timeout 181
server-down "8/10"
server-up "9/10"
type http (value same for https)
request-method GET
request-target "/upload "
admin-status online
write

Real Servers in F5 LineRate: configure
real-server ccuc_omsserver1
ip address 192.168.50.41 7788
max-connections 1000
admin-status online
attach health-monitor mon_ccuc
service http
keepalive-timeout 3600
response-timeout 60
response-idle-timeout 60
write
configure
real-server ccucbip_omsserver1
ip address 192.168.50.41 9788
max-connections 1000
admin-status online
attach health-monitor mon_ccucbip
service http
keepalive-timeout 3600
response-timeout 60
response-idle-timeout 60
write
configure
real-server ccsu_omsserver1
ip address 192.168.50.41 4900
max-connections 1000
admin-status online
attach health-monitor mon_ccsu
service http (value same for https)
keepalive-timeout 3600
response-timeout 60
response-idle-timeout 60
write
configure
real-server ccar_omsserver1
ip address 192.168.50.41 4889
max-connections 1000
admin-status online
attach health-monitor mon_ccar
service http
keepalive-timeout 3600
response-timeout 60
response-idle-timeout 60
write
configure
real-server ccaom_omsserver1
ip address 192.168.50.41 8081
max-connections 1000
admin-status online
attach health-monitor mon_ccaom
service http (value same for https)
keepalive-timeout 3600
response-timeout 60
response-idle-timeout 60
write
configure
real-server ccuc_omsserver2
ip address 192.168.50.42 7788
max-connections 1000
admin-status online
attach health-monitor mon_ccuc
service http
keepalive-timeout 3600
response-timeout 60
response-idle-timeout 60
write
configure
real-server ccucbip_omsserver2
ip address 192.168.50.42 9788
max-connections 1000
admin-status online
attach health-monitor mon_ccucbip
service http
keepalive-timeout 3600
response-timeout 60
response-idle-timeout 60
write
configure
real-server ccsu_omsserver2
ip address 192.168.50.42 4900
max-connections 1000
admin-status online
attach health-monitor mon_ccsu
attach ssl profile ssl_prof_em13c.bavera.net
service http (value same for https)
keepalive-timeout 3600
response-timeout 60
response-idle-timeout 60
write
configure
real-server ccar_omsserver2
ip address 192.168.50.42 4889
max-connections 1000
admin-status online
attach health-monitor mon_ccar
service http
keepalive-timeout 3600
response-timeout 60
response-idle-timeout 60
write
configure
real-server ccaom_omsserver2
ip address 192.168.50.42 8081
max-connections 1000
admin-status online
attach health-monitor mon_ccaom
service http (value same for https)
keepalive-timeout 3600
response-timeout 60
response-idle-timeout 60
write

Pools we will be using: Cloud Control Services Pool Name Associated Health Monitor Load Balancing Members Secure Console pool_ccsc mon_ccsc Least Connections (member) OMS Host A:7799
OMS Host B:7799
Secure BI Publisher pool_ccscbip mon_ccscbip Least Connections (member) OMS Host A:9851
OMS Host B:9851
Unsecure Console pool_ccuc mon_ccuc Least Connections (member) OMS Host A:7788
OMS Host B:7788
Unsecure BI Publisher pool_ccucbip mon_ccucbip Least Connections (member) OMS Host A:9788
OMS Host B:9788
Secure Upload pool_ccsu mon_ccsu Least Connections (member) OMS Host A:4900
OMS Host B:4900
Agent Registration pool_ccar mon_ccar Least Connections (member) OMS Host A:4889
OMS Host B:4889
Always-On Monitoring Secure Upload pool_ccaom mon_ccaom Least Connections (member) OMS Host A:8081
OMS Host B:8081
F5 LineRate equivalent “real server group” for F5 Pool: configure
real-server group pool_ccuc
members by regex " ccuc_.*"
write
configure
real-server group pool_ccucbip
members by regex " ccucbip_.*"
write
configure
real-server group pool_ccsu
members by regex " ccsu_.*"
write
configure
real-server group pool_ccar
members by regex " ccar_.*"
write
configure
real-server group pool_ccaom
members by regex " ccaom_.*"
write

TCP Profiles we will be using
CLOUD CONTROL SERVICE TCP PROFILE NAME Secure Console tcp_ccsc Secure BIP Console tcp_ccscbip Unsecure Console tcp_ccuc Unsecure BIP Console tcp_ccucbip Secure Upload tcp_ccsu Agent Registration tcp_ccar Always-On Monitoring Secure Upload tcp_ccaom
Persistence Profiles we will be using:
CLOUD CONTROL SERVICE F5 PERSISTENCE PROFILE NAME Type Timeout Expiration Secure Console sourceip_ccsc Source Address Affinity 3600 Not Applicable Secure BIP Console sourceip_ccscbip Source Address Affinity 3600 Not Applicable Unsecure Console sourceip_ccuc Source Address Affinity 3600 Not Applicable Unsecure BIP Console sourceip_ccucbip Source Address Affinity 3600 Not Applicable Agent Registration cookie_ccar Cookie Not Applicable 3600
configure
tcp-options-group tcp_ccuc
write
configure
tcp-options-group tcp_ccucbip
write
configure
tcp-options-group tcp_ccsu
write
configure
tcp-options-group tcp_ccar
write
configure
tcp-options-group tcp_ccaom
write
Virtual Servers we will be using
Cloud Control Service Virtual Server Name Virtual IP and Port Protocol Profile (Client) HTTP Profile Source Address Translation iRule Defaut Pool Default Persistence Profile Secure Console vs_ccsc443 VIP:443 tcp_ccsc None Automap None pool_ccsc sourceip_ccsc Secure BI Publisher vs_ccscbip5443 VIP:5443 tcp_ccscbip None Automap None pool_ccscbip Sourceip_ccscbip Unsecure Console * vs_ccuc80 VIP:80 tcp_ccuc http Automap None pool_ccuc sourceip_ccuc Unsecure BI Publisher * vs_ccucbip8080 VIP:8080 tcp_ccucbip http Automap None pool_ccucbip sourceip_ccucbip Secure Upload vs_ccsu4900 VIP:4900 tcp_ccsu None Automap None pool_ccsu None Agent Registration vs_ccar4889 VIP:4889 tcp_ccar http Automap None pool_ccar cookie_ccar Always-On Monitoring Secure Upload vs_ccaom8081 VIP:8081 tcp_ccaom None Automap None pool_ccaom sourceip_aom
* These entries are not considered best practice and are not recommended as they provide unsecured and unencrypted access to Enterprise Manager. But we will be using the SSL termination at the Load Balancer, depending upon the Load Balancer security and Firewall and offloading the SSL processing and need for SSL certificate at each components at EM13c.
Management Service Ports Cloud Control Service TCP Port Monitor Name TCP Profile Name Persistence Profile Pool Name Virtual Server Name Virtual Server Port Secure Console 7799 mon_ccsc tcp_ccsc sourceip_ccsc pool_ccsc vs_ccsc443 443 Secure BI Publisher 9851 mon_ccscbip tcp_ccscbip sourceip_ccscbip pool_ccscbip vs_ccscbip5443 5443 Unsecure Console 7788 mon_ccuc tcp_ccuc sourceip_ccuc pool_ccuc vs_ccuc80 80 Unsecure BI Publisher 9788 mon_ccucbip tcp_ccucbip sourceip_ccucbip pool_ccucbip vs_ccucbip8080 8080 Secure Upload 4900 mon_ccsu tcp_ccsu None pool_ccsu vs_ccsu4900 4900 Agent Registration 4889 mon_ccar tcp_ccar cookie_ccar pool_ccar vs_ccar4889 4889 Always-On Monitoring Secure Upload 8081 mon_ccaom tcp_ccaom None pool_ccaom vs_ccaom8081 8081
configure
virtual-ip vs_ccuc80_ip
ip address 192.168.50.80 80
admin-status online
service http
keepalive-timeout 3600
attach tcp-options-group tcp_ccuc
write
exit
configure
virtual-ip vs_ccuc443_ip
ip address 192.168.50.80 443
admin-status online
service http
keepalive-timeout 3600
attach tcp-options-group tcp_ccuc
write
exit
configure
virtual-ip vs_ccucbip8080_ip
ip address 192.168.50.80 8080
admin-status online
service http
keepalive-timeout 3600
attach tcp-options-group tcp_ccucbip
write
exit
configure
virtual-ip vs_ccsu4900_ip
ip address 192.168.50.80 4900
admin-status online
service http
keepalive-timeout 3600
attach tcp-options-group tcp_ccsu
write
exit
configure
virtual-ip vs_ccar4889_ip
ip address 192.168.50.80 4889
admin-status online
service http
keepalive-timeout 3600
attach tcp-options-group tcp_ccar
write
exit
configure
virtual-ip vs_ccaom8081_ip
ip address 192.168.50.80 8081
admin-status online
service http
keepalive-timeout 3600
attach tcp-options-group tcp_ccaom
write
exit
configure
virtual-server vs_ccuc80
lb-algorithm round-robin
attach virtual-ip vs_ccuc80_ip default
attach real-server group pool_ccuc
service http
persist source-ip
persist source-ip idle-timeout 3600
write
exit
exit
------------------------------
configure
virtual-server vs_ccuc443
lb-algorithm round-robin
attach virtual-ip vs_ccuc443_ip default
attach real-server group pool_ccuc
service http
persist source-ip
persist source-ip idle-timeout 3600
write
exit
exit
configure
virtual-server vs_ccucbip8080
lb-algorithm round-robin
attach virtual-ip vs_ccucbip8080_ip default
attach real-server group pool_ccucbip
service http
persist source-ip
persist source-ip idle-timeout 3600
write
exit
exit
configure
virtual-server vs_ccsu4900
lb-algorithm round-robin
attach virtual-ip vs_ccsu4900_ip default
attach real-server group pool_ccsu
service http
write
exit
configure
virtual-server vs_ccar4889
lb-algorithm round-robin
attach virtual-ip vs_ccar4889_ip default
attach real-server group pool_ccar
service http
persist cookie agent12c
persist cookie agent12c expires 3600
write
exit
exit
configure
virtual-server vs_ccaom8081
lb-algorithm round-robin
attach virtual-ip vs_ccaom8081_ip default
attach real-server group pool_ccaom
service http
write
exit
show run brief


Create Self Signed Certificate and attach it to your Virtual IP’s
openssl req -x509 -nodes -sha256 -days 3650 -newkey rsa:2048 -keyout em13c.bavera.net.key -out em13c.bavera.net.crt
openssl rsa -in em13c.bavera.net.key -text > em13c.bavera.net.key.pem
openssl x509 -inform PEM -in em13c.bavera.net.crt > em13c.bavera.net.crt.pem
openssl x509 -noout -text -in em13c.bavera.net.crt
emctl secure oms -host em13c.bavera.net -secure_port 4900 -slb_port 4900 -slb_console_port 443 -slb_jvmd_http_port 7202 -slb_bip_http_port 8080 -trust_certs_loc /home/oracle/em13c.bavera.net.crt.pem
Step 1: configure Key:
configure
4. Type:
key key_em13c.bavera.net
5. Type:
pem-format
6. Paste the text from the private key file and press Enter.
7. Type:
quit
8. Type:
write
Step 2: Configure Certificate:
Open the primary certificate file in a text editor and copy the text.
2. Type:
configure
3. Type:
certificate cert_em13c.bavera.net
4. Type:
pem-format
5. Paste the text from the certificate file and press Enter.
6. Type:
quit
Step 3: To configure SSL termination:
Type:
configure
2. Type:
ssl profile ssl_prof_em13c.bavera.net
3. Type:
attach key key_em13c.bavera.net
4. Type:
attach certificate cert_em13c.bavera.net
5. Type:
virtual-ip vs_ccsu4900_ip
6. Type:
attach ssl profile ssl_prof_em13c.bavera.net
7. Type:
virtual-ip vs_ccuc443_ip
attach ssl profile ssl_prof_em13c.bavera.net
show virtual-ip vs_ccsu4900_ip
show virtual-ip vs_ccuc443_ip
8. Write
After the install of OMS2:

Step 2: EM13c VM's Setup on VMWare ESXi 6.0.0

# Private_Network - eth0 - node RAC interconnect
10.0.0.1 dbserver1-priv.bavera.net dbserver1-priv
10.0.0.2 dbserver2-priv.bavera.net dbserver2-priv
# Public_Network - eth1 - Host IP
192.168.50.11 dbserver1.bavera.net dbserver1
192.168.50.12 dbserver2.bavera.net dbserver2
192.168.50.41 omsserver1.bavera.net omsserver1
192.168.50.42 omsserver2.bavera.net omsserver2
192.168.50.50 emrep.bavera.net emrep
192.168.50.80 em13c.bavera.net em13c #LineRate Load Balancer VIP - Free Load Balancer from F5
192.168.50.90 oem13c.bavera.net em13c #BIG-IP Load Balancer VIP - May be later 90Days license only
# Virtual IP
192.168.50.21 dbserver1-vip.bavera.net dbserver1-vip
192.168.50.22 dbserver2-vip.bavera.net dbserver2-vip
# SCAN
192.168.50.31 dbserver-scan.bavera.net dbserver-scan
192.168.50.32 dbserver-scan.bavera.net dbserver-scan
192.168.50.33 dbserver-scan.bavera.net dbserver-scan
127.0.0.1 localhost localhost.localdomain localhost4 localhost4.localdomain4
::1 localhost localhost.localdomain localhost6 localhost6.localdomain6
Vmware AMT: http://192.168.1.100:16992/ Network Adapter Purpose MAC Address Interface Method 1 To Internet DHCP eth0 DHCP 192.168.1.100
Vmware.bavera.net ( for vSphere Client) Network Adapter Purpose MAC Address Interface Method 1 To Internet DHCP(static) 64:00:6a:61:1b:62 vmnic0 DHCP 192.168.1.101
dbserver1.bavera.net Network Adapter Purpose MAC Address Interface Method IP 1 Private RAC Interconnect- FIXED 00:0c:29:a3:be:2d eth0 Static 10.0.0.1 2 Public /Host IP -FIXED 00:0c:29:a3:be:37 eth1 Static 192.168.50.11 3 To Internet DHCP 00:0c:29:a3:be:41 eth2 DHCP 192.168.1.88
dbserver2.bavera.net Network Adapter Purpose MAC Address Interface Method 1 Private RAC Interconnect- FIXED 00:0c:29:a5:b0:2d eth0 Static 10.0.0.2 2 Public /Host IP -FIXED 00:0c:29:a5:b0:37 eth1 Static 192.168.50.12 3 To Internet DHCP 00:0c:29:a5:b0:41 eth2 DHCP 192.168.1.86
omsserver1.bavera.net Network Adapter Purpose MAC Address Interface Method 1 Public /Host IP -FIXED 00:0c:29:09:1a:f7 eth0 Static 192.168.50.41 2 To Internet DHCP 00:0c:29:09:1a:01 eth1 DHCP 192.168.1.74
omsserver2.bavera.net Network Adapter Purpose MAC Address Interface Method 1 Public /Host IP -FIXED eth1 Static 192.168.50.42 2 To Internet DHCP eth2 DHCP 192.168.1.90
loadbalancer.bavera.net Network Adapter Purpose MAC Address Interface Method 1 Public /Host IP -FIXED em1 Static 192.168.50.80 2 To Internet DHCP em0 DHCP 192.168.1.89
Step 3: Creating your VM inside ESXi 6.0.0
Login using vSPhere Client from your laptop/desktop:


Step 4: Installing Linux in your VM
We will be using Oracle Linux 7 64 bit with EM 13c 13.1.0.0


Browse Datastore and upload this ISO.


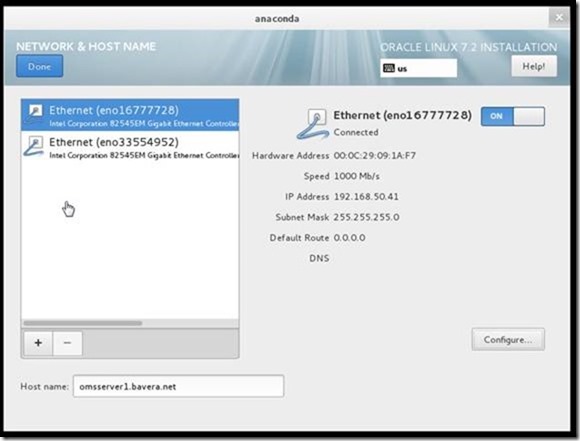


Configure your VM for shared disk access and oracle user
/usr/sbin/groupadd -g 54321 oinstall
/usr/sbin/useradd -u 54321 -g oinstall -G dba,asmdba,backupdba,dgdba,kmdba oracle
mkdir -p /u01/app/oracle
chown oracle:oinstall /u01/app/oracle
mkdir -p /u01/app/oraInventory
chown oracle:oinstall /u01/app/oraInventory
chmod -R 775 /u01/app/oracle
chmod -R 775 /u01/app/oraInventory
chown oracle:oinstall /u01/app
echo "inventory_loc=/u01/app/oraInventory" >/etc/oraInst.loc
echo "inst_group=oinstall" >>/etc/oraInst.loc
mkdir -p /u02/shared; chown -R oracle:oinstall /u02/shared
[root@omsserver1 ~]# service nfs status
Redirecting to /bin/systemctl status nfs.service
● nfs-server.service - NFS server and services
Loaded: loaded (/usr/lib/systemd/system/nfs-server.service; disabled; vendor preset: disabled)
Active: inactive (dead)
Put /etc/hosts entries in omsserver1:
Put /etc/fstab entry for software access:
192.168.50.11:/u02/shared/ /u02/shared/ nfs defaults 0 0
Also, make sure dbserver1 which is the NFS server has allow entry for this server in /etc/exports
[root@dbserver1 ~]# cat /etc/exports
/u02/shared/ 192.168.50.12(rw,sync,no_root_squash)
/u02/shared/ 192.168.50.41(rw,sync,no_root_squash)
/u02/shared/ 192.168.50.42(rw,sync,no_root_squash)
Add or amend the following lines in the "/etc/sysctl.conf" file.
fs.file-max = 6815744
kernel.sem = 250 32000 100 128
kernel.shmmni = 4096
kernel.shmall = 1073741824
kernel.shmmax = 4398046511104
net.core.rmem_default = 262144
net.core.rmem_max = 4194304
net.core.wmem_default = 262144
net.core.wmem_max = 1048576
fs.aio-max-nr = 1048576
net.ipv4.ip_local_port_range = 9000 65500
Run the following command to change the current kernel parameters.
/sbin/sysctl -p
Add the following lines to the "/etc/security/limits.conf" file.
oracle soft nofile 1024
oracle hard nofile 65536
oracle soft nproc 16384
oracle hard nproc 16384
oracle soft stack 10240
oracle hard stack 32768
Install the following packages if they are not already present.
Amend the "/etc/security/limits.d/90-nproc.conf
# Change this
* soft nproc 1024
# To this
* - nproc 16384
vi /etc/fstab
tmpfs /dev/shm tmpfs defaults,size=4g 0 0
Add oracle sudoers so that user can sudo as root as this is Test lab:

https://access.redhat.com/documentation/en-US/Red_Hat_Enterprise_Linux/7/html/System_Administrators_Guide/sect-Managing_Services_with_systemd-Services.html
http://dbakevlar.com/2016/01/installing-a-new-enterprise-manager-13c-environment/
Install the VMWARE Tools
1. Click VM in the virtual machine menu, then click Guest > Install/Upgrade VMware Tools.
From <https://kb.vmware.com/selfservice/microsites/search.do?language=en_US&cmd=displayKC&externalId=1018414>
Step 5: Clone your VM to create second VM
Now, the VM is ready for OMS installation, clone it and create omsserver2 from this
copy .vmx and .vmdk files to "omsserver2.bavera.net" folder


rename the file "omsserver1.bavera.net.vmx" to "omsserver2.bavera.net.vmx"

Ssh to vmware Host and change the vmdk to omsserver2
cd /vmfs/volumes/SSD/omsserver2.bavera.net
vmkfstools -E omsserver1.bavera.net.vmdk omsserver2.bavera.net.vmdk
[root@vmware:/vmfs/volumes/56e1c821-c906c26c-c53b-64006a611b62/omsserver2.bavera.net] vmkfstools -E omsserver1.bavera.net.vmdk omsserver2.bavera.net.vmdk
[root@vmware:/vmfs/volumes/56e1c821-c906c26c-c53b-64006a611b62/omsserver2.bavera.net] ls -ltr
total 31457288
-rw------- 1 root root 2896 Mar 27 16:11 omsserver2.bavera.net.vmx
-rw------- 1 root root 32212254720 Mar 27 16:11 omsserver2.bavera.net-flat.vmdk
-rw------- 1 root root 538 Mar 27 16:19 omsserver2.bavera.net.vmdk
Add this "vmx" file to inventory using vSphere Client:

Now, edit Settings for this new VM, remove the old harddsk and add the copied vmdk as new harddisk


Add new Harddisk:


Note: For EM13c 30GB on root partition is not enough if you are going to have Linux OS also on the same mount:
Minimum CPU, RAM, Heap Size, and Hard Disk Space Requirements Per OMS Evaluation or Simple Installation Advanced Installation (SMALL) Advanced Installation (MEDIUM) Advanced Installation (LARGE) Deployment Size Evaluation or Simple Small Medium Large Configuration 1 OMS, <100 Targets, <10 Agents, <3 Concurrent User Sessions 1 OMS, <1000 Targets, <100 Agents, <10 Concurrent User Sessions 2 OMSes, >=1000 but <10,000 Targets, >=100 but <1000 Agents,>=10 but <25 Concurrent User Sessions 2 OMSes, >=10,000 Targets, >=1000 Agents, >=25 but <=50 Concurrent User Sessions 4 OMSes, >=10,000 Targets, >=1000 Agents, >=25 but <=50 Concurrent User Sessions CPU Cores/Host
(Can be shared with other processes)
2 4 6 12 6 RAMFoot 1
(With Oracle BI Publisher and JVMD Engine)
10 GB 10 GB 12 GB 24 GB 12 GB Hard Disk Space
(With Oracle Software Library, Oracle BI Publisher, and JVMD Engine)
24 GB 24 GB 24 GB 24 GB 24 GB Temporary Directory Hard Disk Space 10 GB 10 GB 10 GB 10 GB 10 GB Oracle WebLogic Server JVM Heap Size 1 GB 1.7 GB 4 GB 8 GB 4 GB
Footnote 1 The physical memory mentioned here includes .5 GB of RAM required for Oracle BI Publisher. At the time of installation, if you choose not to configure Oracle BI Publisher, then the actual physical memory required can be .5 GB less than what is mentioned here.
From <https://docs.oracle.com/cd/E63000_01/EMBSC/preinstall_req_hw.htm#EMBSC124>

Note, down the MAC address for each network card, as it was cloned we have to change it later:

Change the hostname in /etc/hostname ( Linux 7.2) for Linux 6 use /etc/sysconfig/network
Also, disable the selinux in /etc/sysconfig/selinux
Goto /etc/sysconfig/network-scripts change the ip address , also you can use network setting to change the ip


=============================================================================
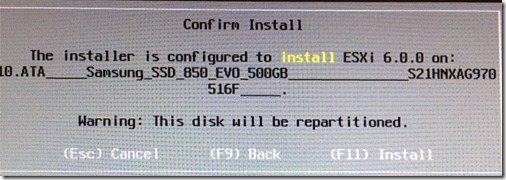
Step 1: Setup VMware ESXi 6.0.0
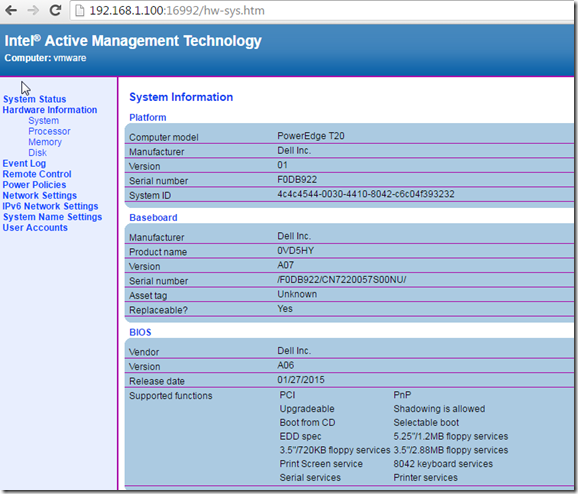
- Get the cheap server you can afford, look for deals at slickdeals.net. I bought a DELL-T20 and additional 500GB SSD and extra RAM.
- Enable AMT ( ctrl+P) admin user: http://192.168.1.100:16992/index.htm?
- Use Rufus 2.7 to write the ISO image, other tools didn’t work
- https://www.vmware.com/support/developer/vcli/
- Make sure the machine boots from your ISO disk and install Vmware ESXi
My intention was to setup a personal EM13c lab using affordable hardware and software but application infrastructure and topology as much as similar to Production grade.
Dell PowerEdge T20 - Xeon E3-1225 @3.2 Ghz
28GB RAM, 500GB SSD+1TB HDD
VMWare ESXi 6.0.0.
Oracle Linux 7.2 for OMS 13c and Database12c
F5 LineRate Precision Load Balancer 2.6.1




Side by Side comparison: ParalleNew+CMS vs G1GC Java Garbage Collector
Verdict: With minimal intervention ParallelNew+ UseConcMarkSweepGC performs well ahead of G1GC.
Note: This test was done on small Heap size of 90M with JDK 1.7.0.67 using Grinder and AuctionImage test application. This is small heap and application but still we see memory fragmentation with PralleNew+CMS and G1GC seems to work well in this area but performance has to improve.
Here are test and result screens in ViisualVM and JMC.
export USER_MEM_ARGS="-Xms90m -Xmx90m -XX:MaxPermSize=256m"
JAVA_OPTIONS+=" -XX:+UseParNewGC"
JAVA_OPTIONS+=" -XX:+UseConcMarkSweepGC"
JAVA_OPTIONS+=" -XX:+UseG1GC"
JAVA_OPTIONS+=" -XX:+UnlockCommercialFeatures"
JAVA_OPTIONS+=" -XX:+FlightRecorder"
Note: All other values default:
3.3Sec Pause 11.4 Sec Pause
![clip_image002[6] clip_image002[6]](https://lh3.googleusercontent.com/-wqGldE0S2jM/VtoU4qajbII/AAAAAAAAORE/gtc8Mfmiq7A/clip_image002%25255B6%25255D_thumb%25255B2%25255D.jpg?imgmax=800)
Three Grinder Tests with:
Left ParalleNew+CMS Right:G1Gc
JAVA_OPTIONS+=" -XX:MaxGCPauseMillis=500"
8.99Sec Pause 30.14Sec Pause
![clip_image002[10] clip_image002[10]](https://lh3.googleusercontent.com/-xw02uyi8V6U/VtoVTloIDiI/AAAAAAAAORQ/GkWiT9TJndQ/clip_image002%25255B10%25255D_thumb%25255B1%25255D.jpg?imgmax=800)
Another three Grind Test:
export USER_MEM_ARGS="-Xms90m -Xmx90m -XX:MaxPermSize=256m
JAVA_OPTIONS+=" -XX:MaxGCPauseMillis=500"
JAVA_OPTIONS+=" -XX:NewRatio=2"
Left: JAVA_OPTIONS+=" -XX:+UseParNewGC"
JAVA_OPTIONS+=" -XX:+UseConcMarkSweepGC"
Right:
JAVA_OPTIONS+=" -XX:+UseG1GC"
![clip_image002[12] clip_image002[12]](https://lh3.googleusercontent.com/-jjUYPqrqjng/VtoVur3rHYI/AAAAAAAAORg/J7sSDKQaX_M/clip_image002%25255B12%25255D_thumb%25255B1%25255D.jpg?imgmax=800)
Result:
Left: 8.54 Sec Pause Right: 1m+ 19.9Sec
JFR for 2 GrindTest:
![clip_image002[14] clip_image002[14]](https://lh3.googleusercontent.com/-MLbwHUo36P0/VtoWJoon-XI/AAAAAAAAORw/H2FyaTfXeyc/clip_image002%25255B14%25255D_thumb%25255B1%25255D.jpg?imgmax=800)
![clip_image002[16] clip_image002[16]](https://lh3.googleusercontent.com/-eTd7LaWOfd4/VtoWkoAk6fI/AAAAAAAAOSA/wgtV1SCGGCs/clip_image002%25255B16%25255D_thumb%25255B2%25255D.jpg?imgmax=800)
Memory Overview Left: PrallelNew_CMS Right:G1GC
![clip_image002[18] clip_image002[18]](https://lh3.googleusercontent.com/-Wna0XgeA-1s/VtoW_tZjBkI/AAAAAAAAOSM/s52dtxKTIc8/clip_image002%25255B18%25255D_thumb%25255B1%25255D.jpg?imgmax=800)
Garbage Collection
![clip_image002[20] clip_image002[20]](https://lh3.googleusercontent.com/-qIjQVHsRT5o/VtoXarRkFWI/AAAAAAAAOSY/Qz531Bsj9SE/clip_image002%25255B20%25255D_thumb%25255B1%25255D.jpg?imgmax=800)
gcPausetime:
![clip_image002[22] clip_image002[22]](https://lh3.googleusercontent.com/-yKBWeh1okn4/VtoX1qPM-xI/AAAAAAAAOSo/yye-WOrrVjs/clip_image002%25255B22%25255D_thumb%25255B1%25255D.jpg?imgmax=800)
GC Configuration:
![clip_image002[24] clip_image002[24]](https://lh3.googleusercontent.com/-JCVhTH1Pd-0/VtoYQ48QUsI/AAAAAAAAOS4/Yw3d1uw3geg/clip_image002%25255B24%25255D_thumb%25255B1%25255D.jpg?imgmax=800)
Threads CPU Usage:
![clip_image002[26] clip_image002[26]](https://lh3.googleusercontent.com/-xKRf_yK5TI8/VtoYrxxLNvI/AAAAAAAAOTI/4ceVSJW4ElA/clip_image002%25255B26%25255D_thumb%25255B1%25255D.jpg?imgmax=800)
Lock Instances:
![clip_image002[28] clip_image002[28]](https://lh3.googleusercontent.com/-_qROERWNjz4/VtoZG7PcKsI/AAAAAAAAOTY/Tm8XyLGgJiI/clip_image002%25255B28%25255D_thumb%25255B1%25255D.jpg?imgmax=800)
Socket Write:
![clip_image002[30] clip_image002[30]](https://lh3.googleusercontent.com/-C08ZTXZ_thE/VtoZh7RZfpI/AAAAAAAAOTo/kD-7hsYwelo/clip_image002%25255B30%25255D_thumb%25255B1%25255D.jpg?imgmax=800)
System:
![clip_image002[32] clip_image002[32]](https://lh3.googleusercontent.com/-cnZEx-ra528/VtoZ9Mhe8hI/AAAAAAAAOT0/Hs1k5pOTO-o/clip_image002%25255B32%25255D_thumb%25255B2%25255D.jpg?imgmax=800)
Code Exceptions:
![clip_image002[34] clip_image002[34]](https://lh3.googleusercontent.com/-t9hTqVDp2nA/VtoaoYYR5tI/AAAAAAAAOUE/an0qazrIC7k/clip_image002%25255B34%25255D_thumb%25255B3%25255D.jpg?imgmax=800)
Verdict: With minimal intervention ParallelNew+ UseConcMarkSweepGC performs well ahead of G1GC.
Note: This test was done on small Heap size of 90M with JDK 1.7.0.67 using Grinder and AuctionImage test application. This is small heap and application but still we see memory fragmentation with PralleNew+CMS and G1GC seems to work well in this area but performance has to improve.
ASR Summary Cheat sheet for Exadata and Enterprise Manager12c
Phone Home feature for Engineered System View the ASR Demo Video.
ASR resolves problems faster by automatically opening service requests for Oracle's qualified server, storage, and Engineered Systems when specific faults occur.
Note: From EM13c onwards ASR is integrated directly.
Refer: https://docs.oracle.com/cd/E63000_01/EMASR/intro.htm#EMASR108
How to use ASR
Summary
1. ASR can be installed in External system Linux or Solaris. (Small RPM package) We can install it in our OMS box.
2. Requires communnication between ExaData Assets where ASR monitoring is valid.
4.15.1 ASR Port Usage http://docs.oracle.com/cd/E37710_01/install.41/e18475/ch4_asr_enviro_admin.htm#ASRUD193
3. Requires Communication to transport.oracle.com:443
4. ASR can send same SR Creation info to Omnibus via SNMP Trap.
4.16.1 Managing SNMP Trap Destinations for Service Request Notifications:
http://docs.oracle.com/cd/E37710_01/install.41/e18475/ch4_asr_enviro_admin.htm#ASRUD200
PRe-Requisite
ASR Manager systems require Oracle Java 7 - JDK 7 (JDK 1.7.0_13) or later JDK 7 updates or Oracle Java 8 (1.8.0_25 or later).
Oracle Linux 5.3 or later. Red Hat Enterprise Linux 6.3 or later.
For IPv6, the ASR Manager server needs to be enabled for dual stack IPv6/IPv4
Test from designated ASR Manager server below:
telnet transport.oracle.com 443
/usr/bin/wget https://transport.oracle.com/v1/
https://transport.oracle.com/v1/
transport.oracle.com (141.146.1.169).
STEPS
1. Set-up firewall rules to allow bi-directional SNMP/UDP traffic to traverse between ASR Assets and the ASR Manager.
2. Ensure that ASR assets can send SNMP telemetry data out on port 162 to the ASR Manager. ( test using OneCommand)
3. Ensure that the ASR Manager can communicate with Service Tags on ASR asset, via http, using port 6481.
4. If your environment requires SNMP v3 to use the Oracle ASR service, you will need to configure both ASR Manager and any ASR Assets. See
Configuring ASR Manager for SNMP v3 and Optional ILOM Setup: SNMP v3 for ASR Assets for more information in Chapter 2.http://docs.oracle.com/cd/E37710_01/install.41/e18475/ch2_asr_manager.htm#CHDBAEEA
http://docs.oracle.com/cd/E37710_01/install.41/e18475/ch3_asr_assets.htm#BABGCHID
5. Verify Telemetry on each component valid for ASR monitoring -http://docs.oracle.com/cd/E37710_01/install.41/e18475/ch1_asr_overview.htm#CEGFGDBG
6. Verify MOS account: MOS accont and SupportIdentifier How To Manage and Approve Pending ASR Assets In My Oracle Support (Doc ID 1329200.1):
7. Install ASR Manager - http://docs.oracle.com/cd/E37710_01/doc.41/e26747/toc.htm
Install ASR Manager -
Test connectivity:
Register ASR with Oracle Support:
asr> register
asr> show_reg_status
asr> test_connection ( /opt/asrmanager/bin/asr test_connection)
asr> autoupdate
asr> show_version
/opt/asrmanager/util/check_asr_status.sh
service asrm stop
tar -cvf db.tar.bz /var/opt/asrmanager/db
tar -cvf configuration.tar.bz /var/opt/asrmanager/configuration
service asrm start
asr> send_deactivations -a
asr> send_activations -a
asr> list_asset
asr> disable_asr_manager <1 48="" hours="" to="">
asr> enable_asr_manager
asr> disable_asset -i IP_address
asr> enable_asset -i IP_address
asr> send_test -i IP_address
asr> send_test -h host name
asr> deactivate_asset -i IP_address
rpm -e asrmanager;rm -rf /var/opt/asrmanager/
asr> set_property snmp.receiver.port 1162
asr> get_property snmp.receiver.port
service asrm restart
8. Configure ASR Assets - http://docs.oracle.com/cd/E37710_01/doc.41/e23333/toc.htm
http://docs.oracle.com/cd/E37710_01/install.41/e18475/ch3_asr_assets.htm#BEIGAFFG
Activate Exadata Assets.--http://docs.oracle.com/cd/E37710_01/install.41/e18475/ch3_asr_assets.htm#BEIDCBAI
Check the Service Tag: http://asr_system_hostname:6481/stv1/agent/
9. Pre-check Engineered Systems ASR Configuration Check via ASREXACHK (Doc ID 1450112.1) to verify the ASR deployment.
10. Approve ASR assets refer
How To Manage and Approve Pending ASR Assets In My Oracle Support (Doc ID 1329200.1)
11. Audit log at /var/opt/asrmanager/log/auditlog
12. Check ASR Email
13. Create Test Alert - ILOM - Refer http://docs.oracle.com/cd/E37710_01/install.41/e18475/ch4_asr_enviro_admin.htm#ASRUD171
14. Check Ports: -4.15.1 ASR Port Usage
15. Configure ASR to send SNMP traps to Command center: 4.16.1 Managing SNMP Trap Destinations for Service Request Notifications:
asr> set_notification_trap [-i ipAddress -p port -c community] [-h hostname -p port -c community]
asr> set_notification_trap -i 127.0.0.1 -p 162 -c public
asr> show_notification_trap
asr> delete_notification_trap -i 127.0.0.1
asr> send_test [-i ipAddress] [-h hostname]
The SUN-ASR-NOTIFICATION-MIB file is located at:
/var/opt/asrmanager/configuration/mib/SUN-ASR-NOTIFICATION-MIB.mib
16. Troubleshooting: http://docs.oracle.com/cd/E37710_01/install.41/e18475/ch5_troubleshooting.htm#ASRUD202
Documentation:
Oracle® Auto Service Request Exadata Database Machine Quick Installation Guide 5.5.1
http://docs.oracle.com/cd/E37710_01/index.htm
http://docs.oracle.com/cd/E37710_01/doc.41/e23333/toc.htm
Oracle® Auto Service Request Exadata Database Machine Quick Installation Guide
Release 5.5
E23333-17
http://docs.oracle.com/cd/E50790_01/doc/doc.121/e23333/toc.htm


