Vidya Bala
OC4J ping timeout issues
Transferring System Statistics to a TEST environment
Is it not possible to Gather System Stats in Production into a Staging Table , export the staging table to the Test environment and then import the Stats into the data dictionary in Test? Even if the above is possible , some key questions still remain while gathering System Stats into a Staging Table in Production -
a)is performance of Production impacted while System Stats is being gathered to a staging table?
b)SQL in the SGA invalidated ? - all documents that I have read so far tell me the answer is "No"
c)Since stats are gathered into a Staging Table , I am assuming no execution plans should change until stats are imported into the data dictionary in Production .
It will be great to know if any one has run into the same issue.
should we change sql to meet ANSI 99 standards
my 2 cents would be "No" - I really see the need to change the SQL if we were migrating say from Oracle to SQL Server for portability reasons. For the most bit Oracle version specific SQL development guides should be ANSI compliant and that should be enough - but then its just the way I have seen things work. Anyone run into the same issue - would be good to know.
A Strange Production Problem!!!
A Strange Production Problem!!!
I suddenly got a call that the Front end Applications have frozen (those are the worst calls….). I logged on to the database server, was unable to login to the database, at the same time got a call that the ……………….
Network Appliance filer experienced a kernel panic or a low-level system-related lockup. The device then rebooted itself to correct the problem and proceeded normally through the startup process.
The database was a 2node RAC Cluster both accessing the NetApp Device via NFS mount points. After the NetApp rebooted itself:
NodeA on the database looked fine: ORACM was up on the server, could login to the database from NodeA.
NodeB: ORACM was down, Instance on NodeB was down.
Net Result: Application was still unable to connect to either of the Nodes using TAF.
Since the Applications were anyways down, the decision was made to restart the Cluster Manager on both nodes and start both the instances. The above resumed operations fairly quickly (not too much time was spent on roll forward and rollback operations, we did not have any long running transactions at the time of abort).
An SR has been opened to discuss if the above was the expected behavior.
With RAC I would have expected the following to happen:
Each Oracle instance registers with the local Cluster Manager. The Cluster Manager monitors the status of local Oracle instances and propagates this information to Cluster Managers on other nodes. If the Oracle instance fails on one of the nodes, the following events occur:
1. The Cluster Manager on the node with the failed Oracle instance informs the Watchdog daemon about the failure.
2. The Watchdog daemon requests the Watchdog timer to reset the failed node.
3. The Watchdog timer resets the node.
4. The Cluster Managers on the surviving nodes inform their local Oracle instances that the failed node is removed from the cluster.
5. Oracle instances in the surviving nodes start the Oracle9i Real Application Clusters reconfiguration procedure.
The nodes must reset if an Oracle instance fails. This ensures that:
· No physical I/O requests to the shared disks from the failed node occur after the Oracle instance fails.
· Surviving nodes can start the cluster reconfiguration procedure without corrupting the data on the shared disk.
In 9i Cluster Reconfiguring is supposed to be fast remastering resources only if necessary and processes on Node A will be able to resume active work during reconfiguration as their locks and resources need not be moved.
However, this was not the behavior we saw when one node totally crashed in our case – while RAC is great it helps you load balance your requests – does it really help in Disaster Recovery ?
Informatica Step by Step to create a Simple Workflow Run successfully:
This post will cover a)How to create Repository User accounts and managing security in Informatica
b)Create a mapping , session, workflow and successfully execute a workflow
How to create Repository User accounts and managing security in Informatica
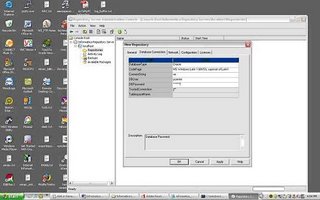
1) Login to Repository Server Admin console.Connect to the Repository Server
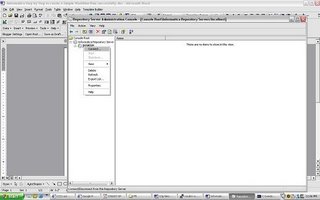 Right click and create new Repository
 4)give the following :
repository name
db connect string
db username : pcenter1
db password : pcenter1
license key information
when you click Apply the Repository content will get created.
5)Once the Repository is created loginto Repsoitory Manager
You can loginto the Repository either as
a) The Repository username/ password provided in the above step
b) Or Administrator
Go the Security > Manage Users and Privileges

By default 2 grps are created “Administrator” and “Public”
2 users are created “Administrator” and “Repository User”
Privileges tab lists all the privileges that are available. This security window can be used to manage Security and privileges – refer help guide for further information on security and privileges.
Create a mapping , session, workflow and successfully execute a workflow
I will use the HR schema to demonstrate how you can create a mapping, session and workflow. The HR schema has the following tables
COUNTRIES
DEPARTMENTS
EMPLOYEES
JOBS
JOB_HISTORY
LOCATIONS
REGIONS
COUNTRY_REGION is table that has country_name and region_name.
To populate the country_region table : is a join between the country table and the region table
To create a mapping:
Open Repository Manager – Connect to the Repository and create new folder within the Repository using Repository Manager.
Connect to Designer
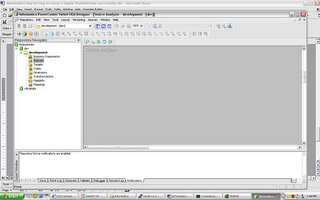 Open the folder up and you should see Sources, Targets , Cubes , Dimensions etc.
From the Sources menu import from source Database objects you need: in this case you will import COUNTRIES and REGION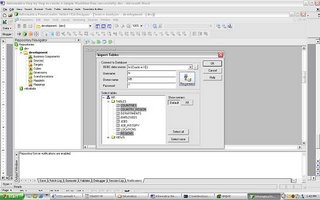 Open Warehouse Designer and Import TargetsImport COUNTRY_REGION from Target Menu.
 Sources and Targets Menu should be as above
Open Mapping Designer.
Drop in the sources to the Mapping Designer, Drop in the target as well to Mapping Designer.Include a Join Transform to join appropriately the COUNTRY and REGION table. Name the mapping as COUNTRY_REGION_MAPPING. While saving the mapping make sure parsing completed with no errors. Errors will be reported on the Output window of the Designer.
Once you have saved the Mapping you can now open up your Workflow Manager to create a session and a workflow. Tasks - Create - creates a new Session or Task
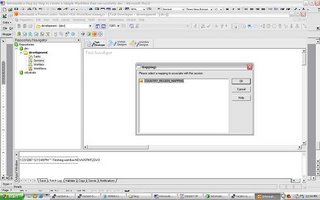 select the COUNTRY_REGION mapping and save the Repository.
Click on Connections/Relational to create 2 new connections for your Source and Target databases. once the connections are created Click on the Task and you should see the following properties window open up
 click on the Mappings Tab and verify the connections are set appropriately.
When you are ready to create the Workflow – Open Workflow Designer and drag and drop the mapping. Name the Workflow as COUNTRY_REGION_WORKFLOW
Save Repository and in the Output window verify that the workflow is valid.
Before you start running the workflow make sure to register the Power Center Server
Open Workflow Manager – Server – Server Registration give all the Power Center Server Registration Properties and define your PMRootDir

Click OK and , Right Click Server and assign the workflow you want to run using the Server. Once you have assigned the workflow to the server you can start the workflow – right click the workflow and click start

 workflow monitor should start indicating the status of the run
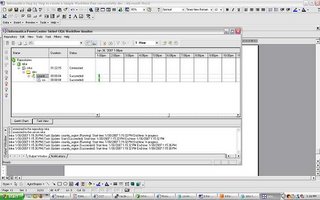 Right click the workflow and task and you should be able to view the workflow log and session log. From workflow Manager workflows can also be scheduled.
If you run into any issues running a workflow – feel free to post comments. The next 2 posts will cover a) versioning b)debugging using informatica.
Informatica Eval Install
Step1
Download Informatica eval install software and license keys.
This was not an easy search for me but finally managed to find where the third party software is.Below are the part numbers you need to downloadLogon to edelivery.oracle.com
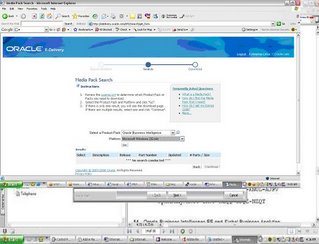
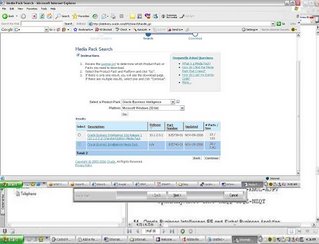
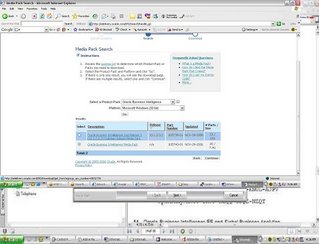
Download B27745-01 Part 1 of 4 Parts 1 through 4 – Siebel Business Applications. Extract the zip files and you should find the eval software for Informatica. Informatica eval license keys can be found in B27757-01 and B27756-01 documentation.
Once you have downloaded and extracted the zip files, go through setup.exe , make sure to install the Server Components and Client Tools


 As discussed in my previous post , Informatica has 4 components to it : Client Tools; Repository Server; Informatica Server and Repository.
At the end of the Install you will have to configure the Repository Server and the Informatica Server.
Configure Repository Server Below:
The following Information needs to be provided:
Server Port Number : 5001 (default can be chosen)
Admin password : enter an Admin Password for the Repos Server
Minimum Port Number
The minimum port number the Repository Server can assign to the Repository Agent process. Default is 5002.
Maximum Port Number
The maximum port number the Repository Server can assign to the Repository Agent process. Default is 65535.
Configuration Directory
The name of the directory in which the Repository Server stores repository configuration information files. You can specify either a relative path or an absolute path. Default is Config.
Backup Directory
The name of the directory in which the Repository Server stores repository backup files. You can specify either a relative path or an absolute path. Default is Backup.
Plugin Directory
The name of the directory in which the Repository Server stores repository plugin files. You can specify either a relative path or an absolute path. Default is Plugin.
Severity Level
The level of error messages written to the Repository Server log. Specify one of the following:
Error. Writes ERROR code messages to the log.
Warning. Writes WARNING and ERROR code messages to the log.
Information. Writes INFO, WARNING, and ERROR code messages to the log.
Tracing. Writes TRACE, INFO, WARNING, and ERROR code messages to the log.
Debug. Writes DEBUG, TRACE, INFO, WARNING, and ERROR code messages to the log.
Output to Event Log
Enable this option if you want to write Repository Server messages to the Windows Event Log. This option is enabled by default.
Output to File
Enable this option if you want to write Repository Server log messages to a file. When you enable this option, enter a file name for the Repository Server log. This option is disabled by default. The default Repository Server log file name is pmrepserver.log. The Repository Server stores the Repository Server log file in the Repository Server installation directory.
 Configure Informatica Server (PowereCenter Server) as a Service:
Information that needs to be provided is as below:
Server Tab:
Server Name: The name of the PowerCenter Server to register with the repository. This name must be unique to the repository. This name must also match the name you specify when you use the Workflow Manager to register the PowerCenter Server.
TCP/IP Host Address: The TCP/IP host address as an IP number (such as 123.456.789.1), or a local host name (such as RECDB), or a fully qualified name (such as RECDB.INVOICE.COM). If you leave this field blank, the PowerCenter Server uses the default local host address.
Max No. of Concurrent Sessions: The maximum number of sessions the PowerCenter Server runs at a time. Increase this value only if you have sufficient shared memory. Default is 10.
Shared Memory: The amount of shared memory available for use by the PowerCenter Server Load Manager process. For every 10 sessions in Max Sessions, you need at least 2,000,000 bytes reserved in Load Manager Shared Memory. Default is 2,000,000 bytes.
Error Severity Level for Log Files: The level of error messages written to the PowerCenter Server log. Specify one of the following message levels:
Error. Writes ERROR code messages to the log.
Warning. Writes WARNING and ERROR code messages to the log.
Information. Writes INFO, WARNING, and ERROR code messages to the log.
Tracing. Writes TRACE, INFO, WARNING, and ERROR code messages to the log. Debug. Writes DEBUG, TRACE, INFO, WARNING, and ERROR code messages to the log.
Fail Session if Maximum Number of Concurrent Sessions Reached: Enable this option if you want the PowerCenter Server to fail the session if the number of sessions already running is equal to the value configured for Maximum Number of Concurrent Sessions. If you disable this option, the PowerCenter Server places the session in a ready queue until a session slot becomes available. This option is disabled by default.
Allow mapping/session debugging: If selected, you can run the Debugger. This option is enabled by default.
Time Stamp Workflow Log: Enable this option if you want to append a time stamp to messages written to the workflow log. This option is disabled by default.
Output to Event Log: Enable this option if you want to write PowerCenter Server messages to the Windows Event Log. This option is enabled by default.
Output to File: Enable this option if you want to write PowerCenter Server log messages to a file. When you enable this option, enter a file name for the PowerCenter Server log.
Repository Tab:
Repository Name : The name of the repository to connect to. You create a repository in the Repository Server Administration Console.
Repository User: The account used to access the repository. When you first create a repository, the Repository User is the database username. You create other Repository Users in the Repository Manager.
Repository Password : The password for the Repository User. When you first create a repository, the password is the password for the database user.
Repository Server Host Name: The name of the machine hosting the Repository Server.
Repository Server Port Number: The port number the Repository Server uses to communicate with repository client applications.
Repository Server Timeout: The maximum number of seconds that the PowerCenter Server tries to establish a connection to the Repository Server. If the PowerCenter Server is unable to connect to the Repository Server in the time specified, the PowerCenter Server shuts down. Default is 60 seconds.
Licenses Tab:
Enter the license Key’s and then click update
Compatibility and Database Tab:
PMServer 3.X aggregate compatibility: If selected, the PowerCenter Server handles Aggregator transformations as it did in PowerMart 3.x. This overrides both Aggregate treat nulls as zero and Aggregate treat rows as insert.
If you select this option, the PowerCenter Server treats nulls as zeros in aggregate calculations and performs aggregate calculations before flagging records for insert, update, delete, or reject in Update Strategy expressions. If you do not select this option, the PowerCenter Server treats nulls as nulls and performs aggregate calculations based on the Update Strategy transformation.
PMServer 6.X Joiner source order compatibility: If selected, the PowerCenter Server processes master and detail pipelines sequentially as it did in versions prior to 7.0. The PowerCenter Server processes all data from the master pipeline before starting to process the detail pipeline. Also, if you enable this option, you cannot specify the Transaction level transformation scope for Joiner transformations. If you do not select this option, the PowerCenter Server processes the master and detail pipelines concurrently.
Aggregate Treat Nulls as Zero: If selected, the PowerCenter Server treats nulls as zero in Aggregator transformations. If you do not select this option, the PowerCenter Server treats nulls as nulls in aggregate calculations.
Aggregate Treat Rows as Insert : If selected, the PowerCenter Server performs aggregate calculations before flagging records for insert, update, delete, or reject in Update Strategy expressions. If you do not select this option, the PowerCenter Server performs aggregate calculations based on the Update Strategy transformation.
PMServer 4.0 date handling compatibility: If selected, the PowerCenter Server handles dates as in PowerCenter 1.0/PowerMart 4.0. Date handling significantly improved in PowerCenter 1.5 and PowerMart 4.5. If you need to revert to PowerCenter 1.0 or PowerMart 4.0 behavior, you can configure the PowerCenter Server to handle dates as in PowerCenter 1.0 and PowerMart 4.0.
Treat CHAR as CHAR on Read: If you have PowerCenter Connect for PeopleSoft, you can use this option for PeopleSoft sources on Oracle. You cannot, however, use it for PeopleSoft lookup tables on Oracle or PeopleSoft sources on Microsoft SQL Server.
Max LKP/SP DB Connections: Allows you to specify a maximum number of connections to a lookup or stored procedure database when you start a workflow. If the number of connections needed exceeds this value, session threads must share connections. This can result in a performance loss. If you do not specify a value, the PowerCenter Server allows an unlimited number of connections to the lookup or stored procedure database.
If the PowerCenter Server allows an unlimited number of connections, but the database user does not have permission for the number of connections required by the session, the session fails. A default value is not specified.
Max Sybase Connections: Allows you to specify a maximum number of connections to a Sybase database when you start a session. If the number of connections required by the session is greater than this value, the session fails. Default is 100.
Max MSSQL Connections: Allows you to specify a maximum number of connections to a Microsoft SQL Server database when you start a workflow. If the number of connections required by the workflow is greater than this value, the workflow fails. Default is 100.
Number of Deadlock Retries: Allows you to specify the number of times the PowerCenter Server retries a target write on a database deadlock. Default is 10.
Deadlock Sleep Before Retry (seconds): Allows you to specify the number of seconds before the PowerCenter Server retries a target write on database deadlock. Default is 0 and the PowerCenter Server retries the target write immediately.
Configuration Tab
Data Movement Mode: Choose ASCII or Unicode. The default data movement mode is ASCII, which passes 7-bit ASCII character data. To pass 8-bit ASCII and multibyte character data from sources to targets, use Unicode mode.
Validate Data Code Pages: If you enable this option, the PowerCenter Server enforces data code page compatibility. If you disable this option, the PowerCenter Server lifts restrictions for source and target data code page selection, stored procedure and lookup database code page selection, and session sort order selection. This option is only available when the PowerCenter Server runs in Unicode data movement mode. By default, this option is enabled.
Output Session Log In UTF8: If you enable this option, the PowerCenter Server writes to the session log using the UTF-8 character set. If you disable this option, the PowerCenter Server writes to the session log using the PowerCenter Server code page. This option is available when the PowerCenter Server runs in Unicode data movement mode. By default, this option is disabled.
Warn About Duplicate XML Rows: If you enable this option, the PowerCenter Server writes duplicate row warnings and duplicate rows for XML targets to the session log. By default, this option is enabled.
Create Indicator Files for Target Flat File Output: If you enable this option, the PowerCenter Server creates indicator files when you run a session with a flat file target.
Output Metadata for Flat File Target: If you enable this option, the PowerCenter Server writes column headers to flat file targets. It writes the target definition port names to the flat file target in the first line, starting with the # symbol. By default, this option is disabled.
Treat Database Partitioning As Pass Through: If you enable this option, the PowerCenter Server uses pass-through partitioning for non-DB2 targets when the partition type is Database Partitioning. Enable this option if you specify Database Partitioning for a non-DB2 target. Otherwise, the PowerCenter Server fails the session.
Export Session Log Lib Name: If you want the PowerCenter Server to write session log messages to an external library, enter the name of the library file.
Treat Null In Comparison Operators As: Determines how the PowerCenter Server evaluates null values in comparison operations. Enable one of the following options:
a)Null. The PowerCenter Server evaluates null values as null in comparison expressions. If either operand is null, the result is null. This is the default behavior.
b)High. The PowerCenter Server evaluates null values as greater than non-null values in comparison expressions. If both operands are null, the PowerCenter Server evaluates them as equal. When you choose High, comparison expressions never result in null.
c)Low. The PowerCenter Server evaluates null values as less than non-null values in comparison expressions. If both operands are null, the PowerCenter Server treats them as equal. When you choose Low, comparison expressions never result in null.
WriterWaitTimeOut: In target-based commit mode, the amount of time in seconds the writer remains idle before it issues a commit when the following conditions are true:
a)The PowerCenter Server has written data to the target.
b)The PowerCenter Server has not issued a committed.
The PowerCenter Server may commit to the target before or after the configured commit interval. Default is 60 seconds. If you configure the timeout to be 0 or a negative number, the PowerCenter Server defaults to 60 seconds.
Microsoft Exchange Profile: Microsoft Exchange profile used by the Service Start Account to send post-session email. The Service Start Account must be set up as a Domain account to use this feature.
Date Display Format: If specified, the PowerCenter Server validates the date display format and uses it in session log and server log entries. If the date display format is invalid, the PowerCenter Server uses the default date display format. The default date display format is DY MON DD HH 24:MI:SS YYYY. When you specify a date display format, it displays in the test window. An invalid date display format is marked invalid.
Test Formatted Date: Read-only field that displays the current date using the format selected in the Date Display Format field.
JVM Options Tab:
You can configure JVM options if you run Java-based programs with PowerCenter Connect products, such as PowerCenter Connect for JMS or PowerCenter Connect for webMethods.
HTTP Proxy Tab:
Server Name: Name of the HTTP proxy server.
Server Port: Port number of the HTTP proxy server.
Username: Authenticated user name for the HTTP proxy server. This is required if the proxy server requires authentication.
Password: Password for the authenticated user. This is required if the proxy server requires authentication.
Domain: Domain for authentication.


 Once you have completed configuring the Repository Server and Power Center Server – Login to the Repository Server Admin Console and create a new Repository
Once the Repository is created (to create the repository a repository schema needs to be created in the database server); the Repository owner information can be used to Login to Designer, Workflow Manager and Workflow Monitor.
The next few posts will cover the following:
a)How to create Repository User accounts and managing security in Informatica
b)Create a mapping , session, workflow and successfully execute a workflow
c)Version Control in Informatica
d)How to debug mappings in Informatica.
Siebel Analytics Answers and Dashboards (a quick getting started guide based on HR schema)
The last post on Sibel Analytics discussed how we build a physical , Business and presentation layer using Siebel Analytics Administration.
This post will focus on using Answers and Dashboards.
Make sure Siebel Analytics Web is up.
For the purpose of this post , I have demonstrated on how you can build Reports using “Answers” against the “hr” schema.
Physical Layer - Make sure to define the object relationships appropriately in the physical layer
COUNTRIES
DEPARTMENTS
EMPLOYEES
JOB_HISTORY
JOBS
LOCATIONS
REGIONS
Busines Layer - Make sure to define the object relationships appropriately in the Business layer
COUNTRIES
DEPARTMENTS
EMPLOYEES
JOB_HISTORY
JOBS
LOCATIONS
REGIONS
Dimensions:
Department Dimension (3 level Dimension)
-Department
-Region
-Country
Job Dimension
-Job Detail
Presentation Layer defined as follows:
Employee
First Name
Last Name
Phone Number
Hire Date
Department
Department Name
City
Region Name
Country Name
Job
Job Title
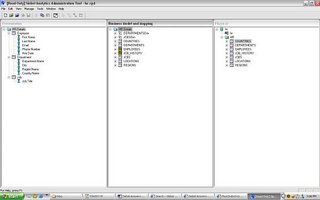 Once the Presentation Layer is defined you are ready to move on to Answers to build your Siebel Analytics Reports
 If you have all Siebel Client Tools on your Desktop ; Siebel Analytics web will take you to the Analytics web page
 The default installation
Default username : AdministratorDefault password: no password once you have logged in you will see the following Tabs
Dashboards,Answers, Advanced Reports,Marketing,Delivers,Disconnected,Admin,My-Account
Step1:
Before proceeding to answers to create Reports let us first create a Shared Folder named “hr” where we can save our Reports. Click on Answers and on the left hand side you should see My Folder > Shared Folder > Manage Catalog
 click on Manage catalog > Shared Folder and you should be able to create a new folder
 make sure to Refresh Display to verify that the changes have taken effect
Step2:
Now you are ready to create Reports using Answers
Click on Answers > Answers is basically your web interface to building Reports
on the right handside you should see Subject areas
click on HRDetails you will now see on the left hand side bar all the Data Items that were defined in the Presentation Layer defined available in Answers
Employee
First Name
Last Name
Email
Phone Number
Hire Date
Department
Department Name
City
Region Name
Country Name
Job
Job Title
Example1 – Report1
To build a Report
First Name,LastName,Department Name,Country Name, Region Name, City
Click on the attributes so that they appear under columns:
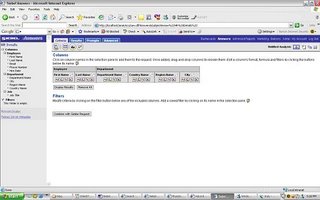 click on Results and you should see the Results
 save your Report to the “hr” shared folder.
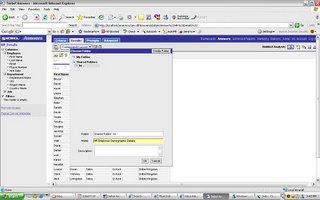
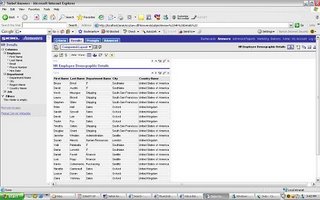 The above Report was HR Employee Demographic Details (List of employees by name,department,city,county)
Example2 – Report 2
Pie Chart to give an overview of number of employees by DepartmentClick on create new request
 Edit Column formula to display first name and last name as a single column called “Employee Name”
 The next step would be to get a count of employees by DepartmentCriteria Tab add Department name and modify “Employee Name” column formula to “count(Employee."First Name"' ' Employee."Last Name")”
 The Results would be as above. Now to covert this to a pie chart (make sure to start Siebel Analytics Java Host)
 Click on the Pie Chart
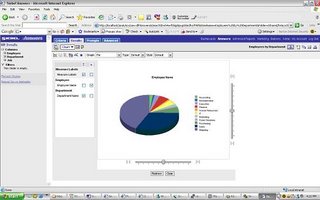 Save the Request as “Employees by Department”
Example 3:We now have 2 Reports
“Employees by Department”
“HR Employee Demographic Details”
lets now add the above 2 Reports to a Dashboard
Click on the Admin Tab
 Click on Manage Intelligence Dashboards.
 Create Dashboard. Name the dashboard as “HR Details”
 you should see the “HR Details” dashboard appear near the “My Dashboard”
Click to Add content and you should be able to add the 2 Reports we created in the “hr” shared folder.
The output would be as below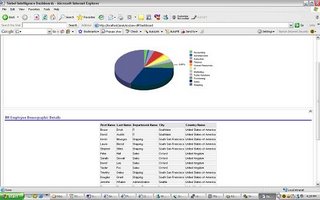
 The layout can be changed by editing properties of sections in the Dashboard
Page Option > Edit Dashboard Click on the Properties Tab of sections if you want to edit the layout of sections.In the below view we have arranged the Reports Horizontally.
 Example 4: Drill down from the Pie Chart to the Report Table in the HR Details Dashboard.
a)To Navigate from Dashboard to Answers easily include the modify link in the Dashboard.Page Options > Edit Dashboard for each section select Properties > Report Links > Modify. Save and go back to Dashboard now you should see the modify links.
 b) To set the navigate link on the Pie Chart.Modify the pie chart > Results > edit view of the pie chart
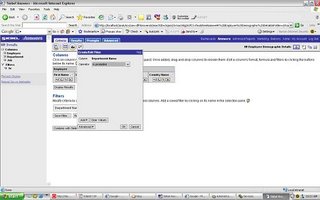
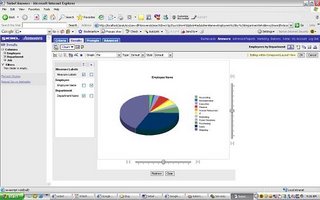 select Additional Charting Options
Interaction Tab > select Navigate > and give the Navigation Page > “HR Details” Dashboard Page 1 c) Add an is prompted filter to the Table Report
from the dashboard click on Modify link of the Table. This will take you to criteria tab on Answers.Add a filter and set Department Name to “is prompted” and save the filter
d) create a Dashboard Prompt click on Answers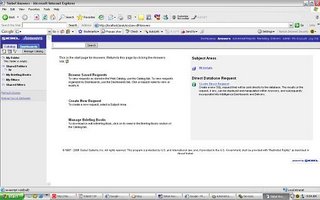 you should see an icon on the Left Menu to create a new Dashboard Prompt
 scope=Dashboardselect the column name on which you want to set the prompt to
save the Dashboard Prompt.
Now go to your Dashboard > Edit Page Options > Drop the Dashboard Prompt in the Section you would like to appear in and you should now see the Prompt on your Dashboard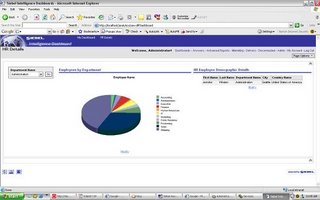
you can drill down by Department Name from the Dashboard Prompt drop down.
e) column sorting on Employee Demographic details
assume you also wanted the ability to sort by columns on the Table Report.Click on the Modify link on the Table Report > go to the Results Tab on Answers> Click on the edit view of the Table and then edit Table properties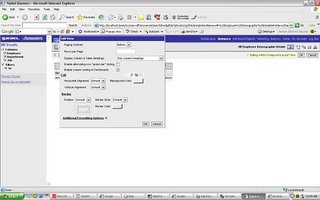
check “ enable column sorting on Dashboard”
At this point you have a fully functional Dashboard with Drill down ability both from the Dashboard prompt and from the pie chart to the Table.
The next posts will discuss:
1)XML Publisher and Answers/Dashboards
2)Admin Options with Answers(managing security, ibots etc)
Deployment Options with XML Publisher
XML Publisher (also called BI Publisher) has the following Deployment options
1) Oracle Applications (will not be discussed in this post)
2) XML Publisher Desktop Edition
Installs XML Publisher Template Builder in Microsoft word that helps you build templates for your Reports. The templates can be stored as rtf files. Following are the Source Data Options using Template Builder in word
a)XML File
b)SQL Query , needs connection information to source database
c)XML Schema
d)XML generated by Siebel Analytics Answers (I have not been able to get this to work , it may be something that will be available in the next releases and more easily integrated in the next few releases of Siebel Analytics)
3) XML Publisher Enterprise Edition
a)provides a web based console that can be used to publish multiple reports
b)XML Publisher enables you to define your reports and separate the data from the layout of the reports .
c)XML Publisher can run on any J2EE compliant Application Server
XML Publisher Desktop Edition:
If you have installed the Desktop Edition
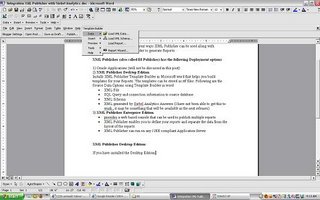 Template Builder Options will be available from MS Word menu.
Template Builder – Data – Load XML Data (XML File) , XML Schema , Report wizard (lets you give database connect information and the sql to extract the data)
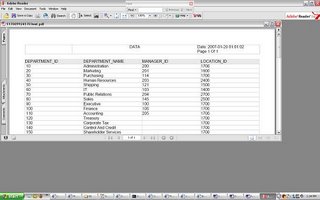
Below will list a quick example on how the Report Wizard can be used (connecting to the hr schema to get a list of Departments)
 give the database connect information and sql query for the data that needs to be retrieved.We will choose the Default Template Layout in this example.
 preview the Report and then save the RTF file (in this example we save the RTF file as hr_departments.rtf
 XML Publisher Enterprise Edition
As mentioned XML Publisher enterprise edition can run on any J2EE compliant Application Server.
The Admin and Reports directories are available under
Install_dir/xmlpserver
The following files have the port numbers used by the application.
HTTP Port 15101 install_dir/default-web-site.xml
RMI Port 15111 install_dir/rmi.xml
JMS Port 15121 install_dir/jms.xml
Default URL to access XML Publisher Application http://host:15101/xmlpserver (default username/pwd admin/admin)
create new folder and new Report in the corresponding folder.
Edit the Report to define the following properties:
i)datasource for the Report (new datasources can be created in the Admin window)
ii)Data Model: Define the sql query
iii)New List of Values: If the Report uses LOV’s

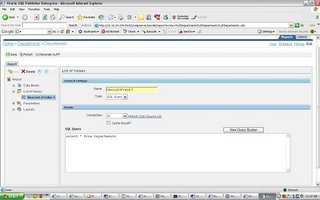 iv)Parameters: if any parameters are needed for the Report
v)Layouts: create a new template called hr_departments upload hr_departments.rtf and tie it to the hr_departments template.View the results
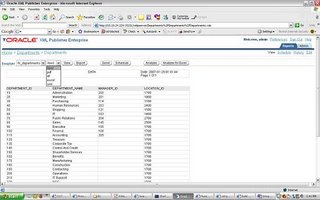 you can see that the template is chosen by default and the different output formats available. The above is a very simple illustration of how XML publisher will let your users design their own Reports(and manage changes to design templates of reports) while IT can focus on the data needed for the Reports and other important tasks.
OracleXml putxml limitations
Example1:xml file(test.xml):
ROWSET
ROW num="2"
ID 15 /ID
/ROW
/ROWSET
(using the java API for XDK) the below command
java OracleXML putXML -user "vidya/vidya" -ignorecase –filename "test.xml" "emp"
will load one row into table emp.
Example2:Xml file with namespaces (test1.xml):
ns:EMP
ns:ITEM
ns:ID 2 /ns:ID
/ns:ITEM
/ns:EMP
(using the java API for XDK) the below command
java OracleXML putXML -user "vidya/vidya" -ignorecase –filename "test1.xml" "emp"
if “OracleXML” cannot identifiy the ROWTAG the above command can be modified as below
java OracleXML putXML -user "vidya/vidya" -ignorecase –rowtag “ITEM” –filename "test1.xml" "emp"
note the above will error as OracleXML doesn’t seem to be working on
a file with namespaces. The only way to probably get around this is by applying a stylesheet.
Oracle Text 9i Bug searching XML Data
Searches with auto_section_group work in 9.2.0.6 but not for attributes within a tag. For example
Book title="A" author="B"
attributes title and author cannot be searched using auto_section_group section type in 9.2.0.6. The bug has been fixed in 9.2.0.8
9i bug using Oracle Text to search XML data
Create table test(id integer,DATA CLOB)
Department name="CS"
Employee
Vidya Bala
/Employee
/Department
Step1:
--------
Create an auto section group
begin
ctx_ddl.create_section_group('myautosectiongroup', 'AUTO_SECTION_GROUP');
end;
Step2:
-------
create index test_index on test(DATA)
indextype is ctxsys.context
parameters ('SECTION GROUP myautosectiongroup');
Step3:
---------
SELECT DATA FROM TEST
WHERE CONTAINS(DATA, 'Vidya WITHIN Employee') > 0;
1 Row Returned
SELECT DATA FROM TEST
WHERE CONTAINS(DATA, 'CS WITHIN Department@name') > 0;
0Rows (10g returns 1 row – 9i returns no row – Support is working on getting bug fix for the issue)
10G SQL Access Advisor and SQL Tuning Advisor
There were a bunch of queries that we have been meaning to tune for quite some time , I thought I could create a tuning task with 10G SQL Tuning advisor and see if I could get some valuable recommendations.
The Recommendations I got were far from anything of significance (eg: add an index to a small lkup table).
I couldn’t help but wonder is there is much success/help using Oracle 10g SQL Access/Tuning Advisor in the industry
ASM and NetApp Filer
I have been spending the last few days looking into what advantages we would have using ASM on a NFS mount as opposed to having the database files directly on NFS. If your on RAC then ASM is mandatory but for non RAC 10g instances and NetApp - ASM is not mandatory.
The biggest benefit I see is volume management features with ASM.
does this mean I can change volume sizes etc actually online ? may be IO balancing across different volumes an added feature. I am walking into a totally new area (ASM on any kind of direct attach storage I can for sure see it being beneficial on NFS I am not so sure?)
anybody with sucess stories?
Cross Platform Migration 9i to 10g
Cross Platform Migration 9.2.0.6(Suse SLES8) Standard Edition to 10g Rel 2 (Solaris 10)
This is a quick overview of a migration procedure I have just finished implementing on a test environment– If you see anything else in the procedure that should be added or should be noted, please feel free to post comments – as always there has been a lot of mutual learning and help from my blog readers.
Step1: Server A :
Clone Production Database to Preprod Environment. (Datafile,Redologfile,controlfiles all on Shared File System NFS).
Database Release : 9.2.0.6
Suse Linix version : SLES 8
Database Size : 50.89 G
Step2: Server B:
Install 10g Release 2 on a new SLES 9 server. Note 10g Release 2 is not supported on SLES8.
Make sure shared file systems on ServerA are mounted on Server B.
Copy parameter file from Server A to Server B . Make appropriate path changes to parameter file on Server B.
Database Release : 10g Release 2
Suse Linix version : SLES9
Step3: Upgrade 9i database to 10G
On Server B upgrade 9.2.0.6 database to 10G
sqlplus /nolog
startup upgrade
CREATE TABLESPACE sysaux DATAFILE ' sysaux01.dbf'
SIZE 500M REUSE
EXTENT MANAGEMENT LOCAL
SEGMENT SPACE MANAGEMENT AUTO
ONLINE;
Set the system to spool results to a log file for later verification of success:
SQL> SPOOL upgrade.log
Run catupgrd.sql:
SQL> @catupgrd.sql
Run utlu102s.sql to display the results of the upgrade:
SQL> @utlu102s.sql
Turn off the spooling of script results to the log file:
SQL> SPOOL OFF
Shut down and restart the instance to reinitialize the system parameters for normal operation.
SQL> SHUTDOWN IMMEDIATE
SQL> STARTUP
Run utlrp.sql to recompile any remaining stored PL/SQL and Java code.
SQL> @utlrp.sql
Verify that all expected packages and classes are valid:
SQL> SELECT count(*) FROM dba_objects WHERE status='INVALID';
SQL> SELECT distinct object_name FROM dba_objects WHERE status='INVALID';
Exit SQL*Plus.
Total Time to Upgrade Database : 38 minutes
Step 4 – Upgrade 10g Database (using expdp)
Now that we have the database migrated to 10gRel2 on Server B(SLES9), we can export the database using 10g datapump. We will export only the Application Related Tablespaces. Tablespaces excluded are as below
PERFSTAT
SYSAUX
SYSTEM
UNDOTBS1
TEMP
DRSYS
INDX --- no application related objects in this tablespace
TOOLS
USERS
XDB
UNDOTBS2
Before running the export – OWM and OLAP options need to be de-installed if not being used to avoid export errors
If the Oracle Workspace Manager feature is not used in this database: de-install the Workspace Manager:
SQL> CONNECT / AS SYSDBA
SQL> @$ORACLE_HOME/rdbms/admin/owmuinst.plb
clean up AW procedural objects:SQL> conn / as SYSDBASQL> delete from sys.exppkgact$ where package = 'DBMS_AW_EXP';
Afterwards, run the export.
CREATE OR REPLACE DIRECTORY pump_dir AS 'xxxxxxxxxxxxxxxx';
Export only application related tablespaces
$ORACLE_HOME/bin/expdp system/manager tablespaces=\(t1,t2 \) directory=pump_dir dumpfile=pump.dmp logfile=pump.log
Full database export of 50+G database took about 80 minutes to export
Step5 – Prepare Target environment – Server C with 10g Release 2
Install 10g Release 2 on Solaris 10 Servers (SERVERC).
Installing Oracle Database 10g Products from the Companion CD
The Oracle Database 10g Companion CD contains additional products that you can install. Whether you need to install these products depends on which Oracle Database products or features you plan to use. If you plan to use the following products or features, then you must complete the Oracle Database 10g Products installation from the Companion CD:
· JPublisher
· Oracle JVM
· Oracle interMedia
· Oracle JDBC development drivers
· Oracle SQLJ
· Oracle Database Examples
· Oracle Text supplied knowledge bases
· Oracle Ultra Search
· Oracle HTML DB
· Oracle Workflow server and middle-tier components
On Server C use DBCA to create database creation scripts. Select the config parameters you need for your database as you go through the DCA wizard.
The scripts will create a standard database with no application related objects yet. Run create scripts to create database.
Tablespaces created (this is assuming none of the additional components were installed)
SYSTEM
UNDOTBS1
SYSAUX
TEMP
USERS
Make sure the Listener is up.
http://ServerC:1158/em
is the em console for the database
Note the below before proceeding with the em console
Oracle Enterprise Manager 10g Database Control is designed for managing a single database, which can be either a single instance or a cluster database. The following premium functionality contained within this release of Enterprise Manager 10g Database Control is available only with an Oracle license:
t(void 0,'12')
Database Diagnostics Pack
Automatic Workload Repository
ADDM (Automated Database Diagnostic Monitor)
Performance Monitoring (Database and Host)
Event Notifications: Notification Methods, Rules and Schedules
Event history/metric history (Database and Host)
Blackouts
Dynamic metric baselines
Memory performance monitoring
t(void 0,'12')
Database Tuning Pack
SQL Access Advisor
SQL Tuning Advisor
SQL Tuning Sets
Reorganize Objects
t(void 0,'12')
Configuration Management Pack
Database and Host Configuration
Deployments
Patch Database and View Patch Cache
Patch staging
Clone Database
Clone Oracle Home
Search configuration
Compare configuration
Policies
Step6 – Prepare Target environment – Server C with Application related Objects
IMPDP will be used to import Application Related objects into this database.
Before running IMPDP the target database will need to be prepared with the Application Tablespaces and Application Schema’s. This is also a great opportunity to reorg objects if you need to. Scripts to create Application Tablespaces and Schemas are prepared.
This is the most important step in preparing the target environment.
Once the Target environment is prepared – import the dumpfile using the following command.
$ORACLE_HOME/bin/impdp system/manager full=y directory=pump_dir1 dumpfile=pump.dmp logfile=pump_import.log
Before opening the database for public connections
1)Recompile for invalid objects (run utrp.sql)
2)Gather statistics for entire database
There will be a regression tests run at the end of all this to test Application Functionality, long datatypes etc.
Future Direction - 10g Forms/Reports Developer vs JDeveloper
so the final question while migrating new Apps would it be better to use Oracle Forms/Reports or Jdeveloper????? my 2 cents
1)If the application is database centric without too much business logic involved and if your team has a PL/SQL back ground as opposed to a Java backgrouund then 10g Forms/Reports may be a better bet.
2)If the team is pretty much a J2ee development team then JDeveloper may be the route to go.
I am not too worried about Oracle's strategy to support Forms/Reports (I think they will). The above is just my 2 cents any input from my blog readers will be greatly appreciated.
online reorg options if you are on Standard Edition
Quest Central Space Management have the following Reorg Options
a)Standard Reorg(offline mode no DML activity allowed on Reorg table)
b)Live Reorg (online mode) - has 2 option
1)TLOCK switch (can be used if your on Std edition - a copy table is created and a trigger based approach to get the copy table in sync, when you are ready the TLOCK switch can be performed - during the switch you will need to have a downtime but will be nothing significant)2)Online Switch(This option needs Oracle Partitioning enabled - pretty much you will need enterprise edition for this option)
Siebel Analytics Install and Siebel Analytics Administration:
Logon to http://edelivery.oracle.com/Ok finding the Siebel Analytics Download can be tricky on edelivery
 Product – pick Oracle Business Intelligence and the appropriate Platform
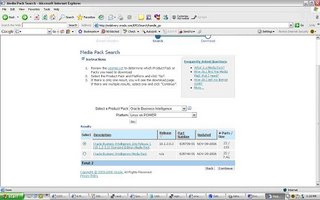 pick the Business Intelligence media pack
If you plan to evaluate on Windows download
B30721-01 Part 1 of 2 and B30721-01 Part 2 of 2
The above 2 parts will your Sibel Analytics Server, Siebel Analytics Web, Siebel Analytics Scheduler, Siebel Analytics Java Host, Siebel Analytics Cluster
Now if your looking to download third party products like Informatica , Actuate etc you will have to download B27745-01 Parts 1 through 4. This post will focus on the Siebel Analytics Server.
Once you have downloaded B30721-01 Part 1 of 2 and B30721-01 Part 2 of 2 , extract the zip files , find the installer and walk through the install. The install is pretty intuitive. If you run into any issues with the install (post comments on the blog and I can help you out with it).
Once you have completed the install , if you are on windows you will see 5 services created Sibel Analytics Server, Siebel Analytics Web, Siebel Analytics Scheduler, Siebel Analytics Java Host, Siebel Analytics Cluster – these are your key components for the Siebel Analytics Server.
Make sure your Siebel Analytics Server and Siebel Analytics Web service is started.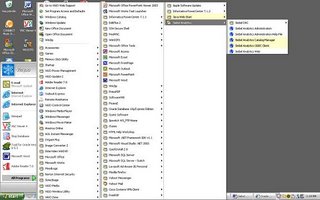 A couple of Siebel Analytics shortcuts will be installed on your desktop.
The first step in using Siebel Analytics to generate Reports is to define the metadata layer. The metadata layer is defined using the Siebel Analytics Administration tool.Click on the Siebel Analytics Administration Tool. you can see the Administration Tool has 3 layers. The physical layer, Business Model and Mapping Layer and Presentation Layer.
Step1: Physical Layer:
Define your datasources in this layer. Create an ODBC datasource for the source database. For the purpose of this test we will be connecting to the perfstat schema on a DEV1 Instance.
In the physical layer right click and create your database connection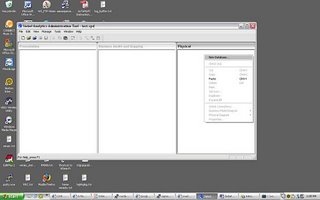 once you create your database folder import your database objects
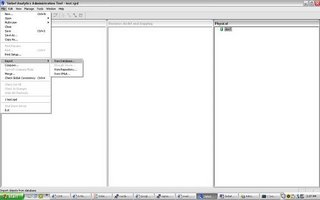 select the schema you want to import and click import (choose FK constraints if you want to import the objects with FK constraints) – once you have imported the schema you should see it in the dev1 folder
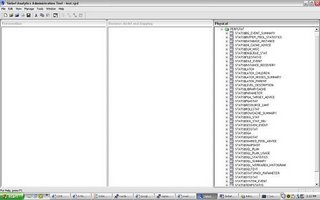 Perfstat schema has been chosen just for illustration purposes , ideally you want your source database to be a warehouse or a mart , in the abscence of one and oltp system can also be your source (note if an oltp db is your source it will call for more work on the business mappings layer)– however in this post I will attempt to design this schema for Reporting Purposes.
Assuming that the crux of your reporting is Reporting on sql statement statististics :
SQL_STMTS_STATS will be our fact table in the Business Mappings Layer.
Some Dimesions around it will be
Instance Details
Execution Plan Cost Details
This is like a 2 dimensional star schema.
Now let us see how the following objects exist in our physical layer and model it in our business layer.
The 4 objects we will be looking at is
STATS$DATABASE_INSTANCE
STATS$SNAPSHOT
STATS$SQL_PLAN_USAGE
STATS$SQL_SUMMARY
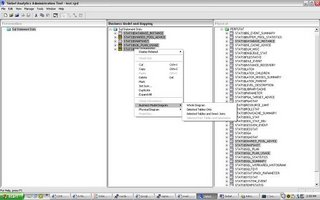
Select the above 4 objects in your physical layer - right click and view physical diagram of the selected objects
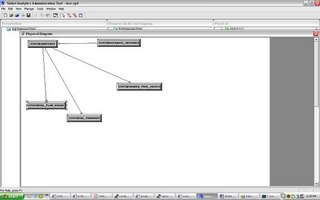 Now create a new business model folder and drag and drop the 4 objects to the business model layer.
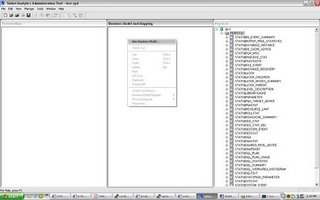
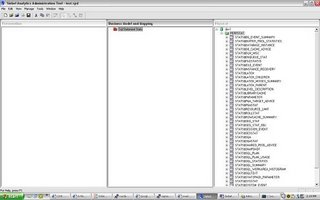 Once you have dropped the objects in the Business layer you can define the relationship between the 4 objects in the Business Layer(select the objects , right click and define the relationships in the Business Diagram area) - this is where a traditional normalized oltp schema in the physical layer will lend into a star or snowflake schema. in the Business layer.
Now let us also look into what attributes we actually need for the Presentation layer and what dimensions we need.
The Business layer is where I start modeling and maping objects with the Business Model in mind.For instance if STATS$DATABASE_INSTANCE is a good candidate for a dimension then right click on the object in the Business Model Layer and say create dimension
Once I have modeled my Business Layer to the way I want it to be , I can drag and drop objects in the Presentation Layer.
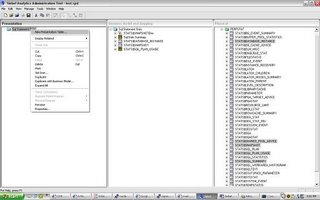 so we started with the perfstat schema and this is what we cameup with in the Presentations Layer
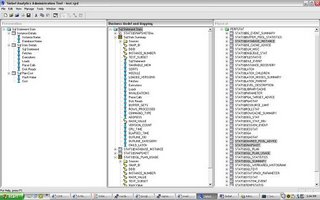
Instance Details
- Instance Name
- Database Name
Sql Stats Details
- Sql Statement
- Fetches
- Executions
- Loads
- Parse Calls
- Disk Reads
Sql Plan Cost
- Hash Value
- Cost
All the underlying relationships and hierarchy is masked at this presentation layer. All you see at this presentation layer is key Presentation Elements that a Business user really care about.
The next post will cover how the presentation layer can be used to build Reports using Siebel Analytics Web Console (typically the power users)
For questions – please feel to free to post them in the comments sections.
Make sure to save your work on the Siebel Analytics Administration Tool –a Repository consistency check is done at the time of saving your work – also check in changes will do a Repository Consistency Check.
expdp of 9i database from 10g Oracle_Home
Compatibility Matrix for Export & Import Between Different Oracle Versions
Doc ID:
Note:132904.1
Leaves me with the option of either using traditional "exp" can be very slow on a 100G+ database not sure if Cross Plaform Migration is an option with Standard Edition.
Siebel Analytics
I have been spending the last few days setting up BI Reports using BI Suite Enterprise Edition as a proof of concept for Business users to evaluate the Product.
I have liked the Product so far,
(i) very user friendly
(ii)once the metadata layer is defined Business users are masked from underlying tables and relationships they don’t need to know about
(iii)A lot of sleek display features in the Product.
(iv)Skill Level not extremely difficult. If you have worked in the Database and BI world it should be fairly easy to learn how to use the Product.
(v) I will review a step by step evaluation of the Product once I have it installed in my system.
Details on the Product:
Key feature of the Product (mainly Siebel Analytics/Answers):
(i)Has a BI Server ; BI Web Console; BI Admin Client Tool
(ii)BI Server is not integrated with the 10g Application Server (it runs separately and is not a container in your Application Server like the way it was with Discoverer)
(iii)I believe there are claims that with 11G App Server the OEM Console can manage the BI Server as well.
(iv)When a request is sent to the webserver a Logical query is sent to the BI Server – The BI Server then checks if the data is in the Cache – if not in the cache a physical SQL is sent to the database.
(v)All metadata information is stored in flat files as opposed to any repository – so should be easy to move across environments – the metadata flat files also support multiuser capability.
(vi)Security Services available with your BI Server (VPD security)
(vii)BI Admin Tools – has pretty much 3 layers (a) the Physical Layer where datasources are defined; ODBC is used to define the datasources (b) the Business/ Mappings layer where you build your Business mappings and (c) Presentation Layer where define how your data needs to be presented.
(viii)The Webconsole has (a) Answers – this is what is used by your Business users to create Reports using data items available in your presentation layer. (b)Dashboard – is where Reports built using Answers can be published on your Dashboard (c)Admin – to manage user accounts , analytics catalog, dash board permissions etc (d) Delivers – can schedule jobs for web cache refreshes. Also Oracle XML Publisher is a part of the BI EE Suite
I am excited about having all our Reports moved to Siebel Analytics – I will have an end to end sneak preview of the Product posted on my blog soon.
It has not been an easy ride for us on Suse (SLES 8)
the issue this morning was:
we were trying to use the XML parser in the database
java OracleXML getXML -user "ccccc/ccccc" "select * from emp"
Exception in thread "main" java.lang.UnsatisfiedLinkError: no ocijdbc9 in java.library.path
CLASSPATH, LD_LIBRARY_PATH have all been set correctly.
I turned around ; added the jars on my Solaris box and ran the command ...........it worked.
so started looking at Suse Mailing Lists - and ofcourse a lot of people have been having problems with jdbc on suse- is there a bug fix? (well I dont know at this point - I have a tar opened).


